This section covers:
- Introduction
- Adding Check-in Locations
- Editing Check-in Locations
- Deleting Check-in Locations
- Mapping Check-in Locations to Employees
- See transactions data of employees checking-in from the app
Introduction
App check-in locations enable an individual to check-in from certain pre-set locations via CamAttendance Employee App. In case, you want an employee to check from any other location aside from the Check-in locations that you have set in, you can go to that employee in Master Data and allow him/her access to check-in or check-out from any random location via GPS tracking.
Now the user can define the mapping of different Access levels by creating Location Categories.
- The Location Categories can now be created from the Admin portal itself.
- To create a new Location category, click on Master Data> Check-in Locations> Location Categories> Add New
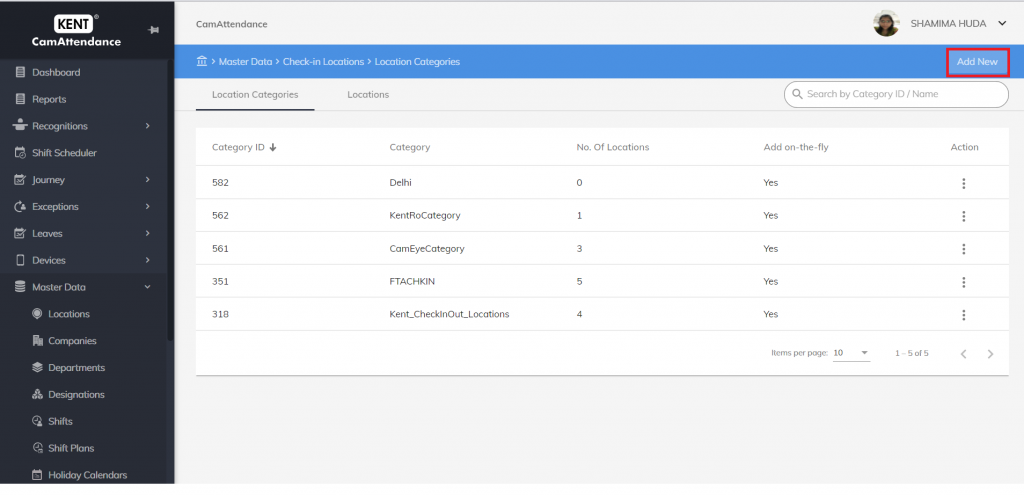
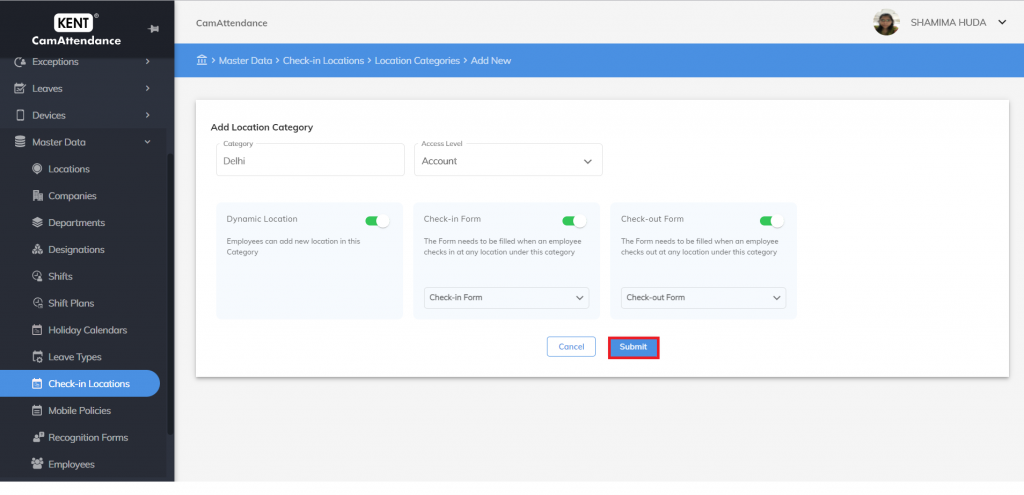
- Once we add a Location Category named Delhi here, now we will map a check- in location with the same.
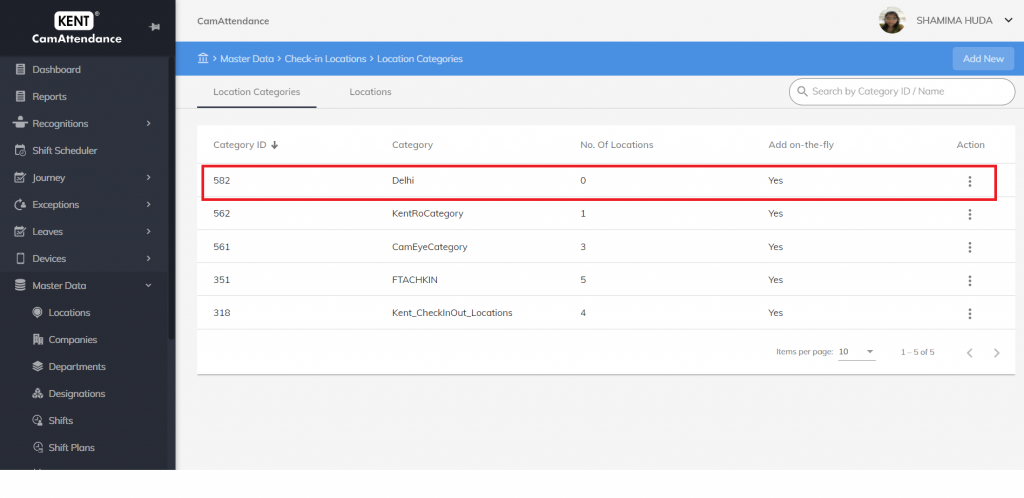
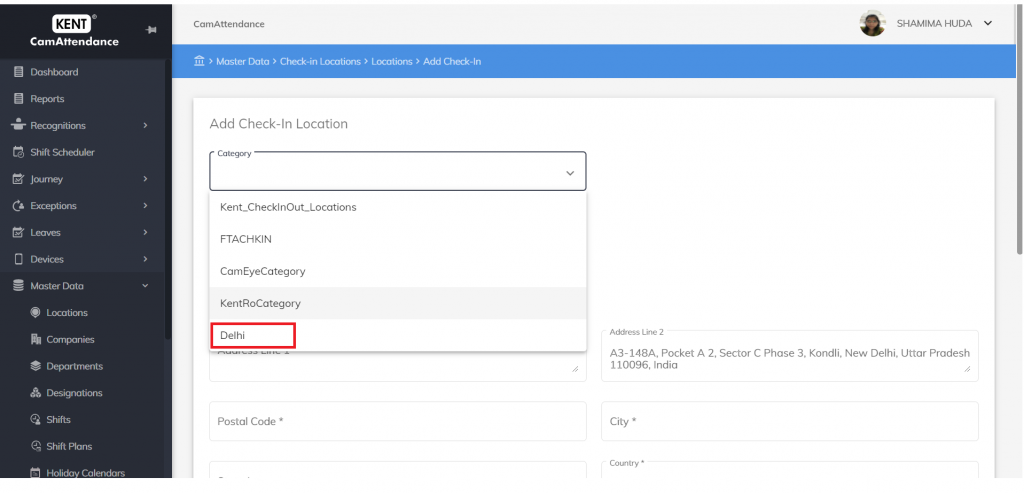
- To add a new check-in location under the new created Category, click on Add new and enter the location details and submit
Apart from this Are employee allowed to add new location in this category?
is added which basically enables the Employee to add a dedication location as default check-in location from his/her end.
Adding Check-in Locations
To add check-in locations, go to Home>Master Data>Check-in locations.
- Click Add New.
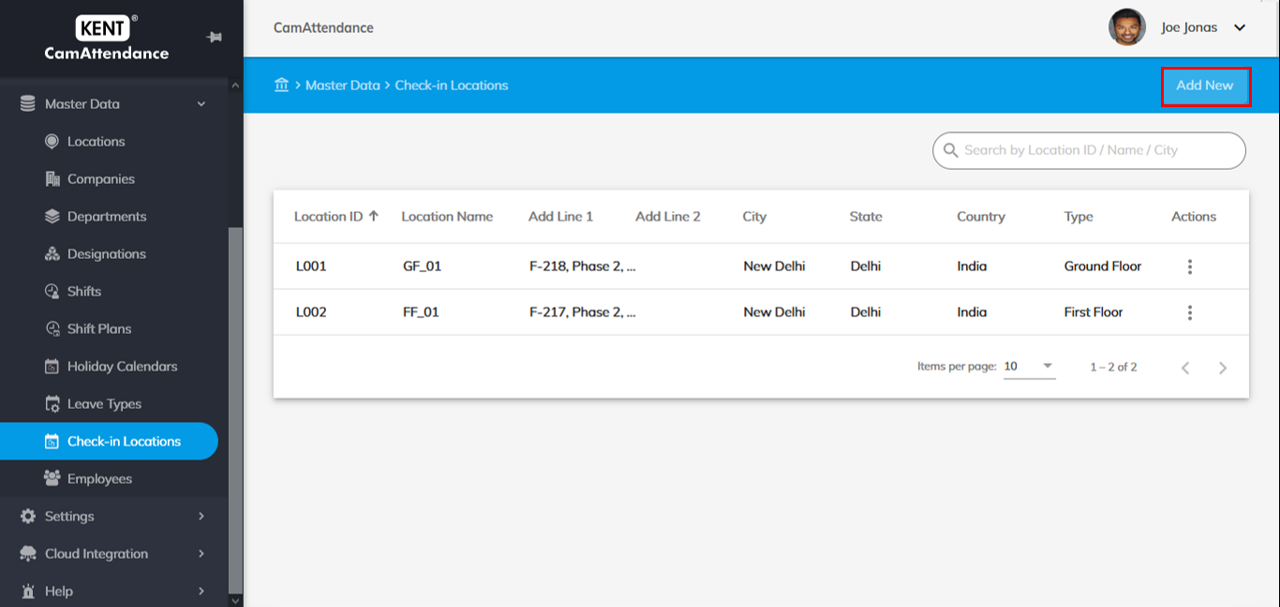
- Add Location Type by clicking the dropdown. This could be the category of the location from where you want to allow the employee to check-in e.g. Home, On-site or client’s location, Head office, Sales office, etc.
- Enter Location ID and Location Name.
- Enter Address in Address Line 1 and Address Line 2.
- Enter Postal Code*, City*, and State*.
- Select a Country* from the dropdown.
- Click Submit.
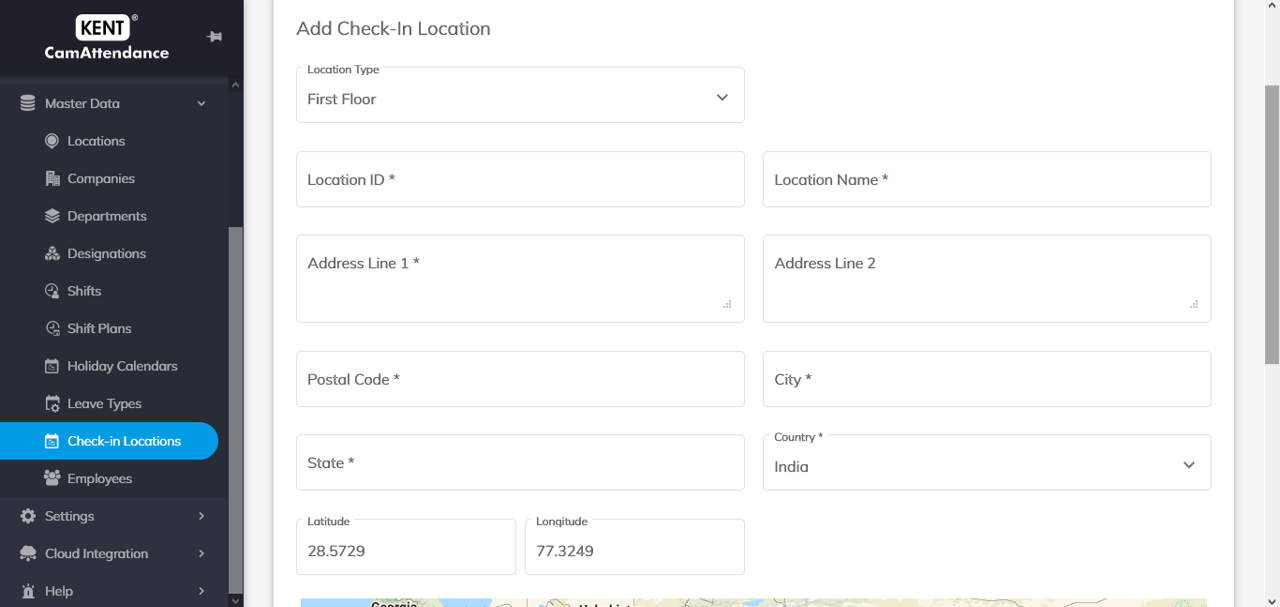
A new check-in location will be added which can be seen in Home>Master Data>Check-in Locations.
Editing a Check-in Location
- Go to Home>Master Data>Check-in Locations.
- Click on the three dots
 under Actions in front of the check-in location that you want to edit.
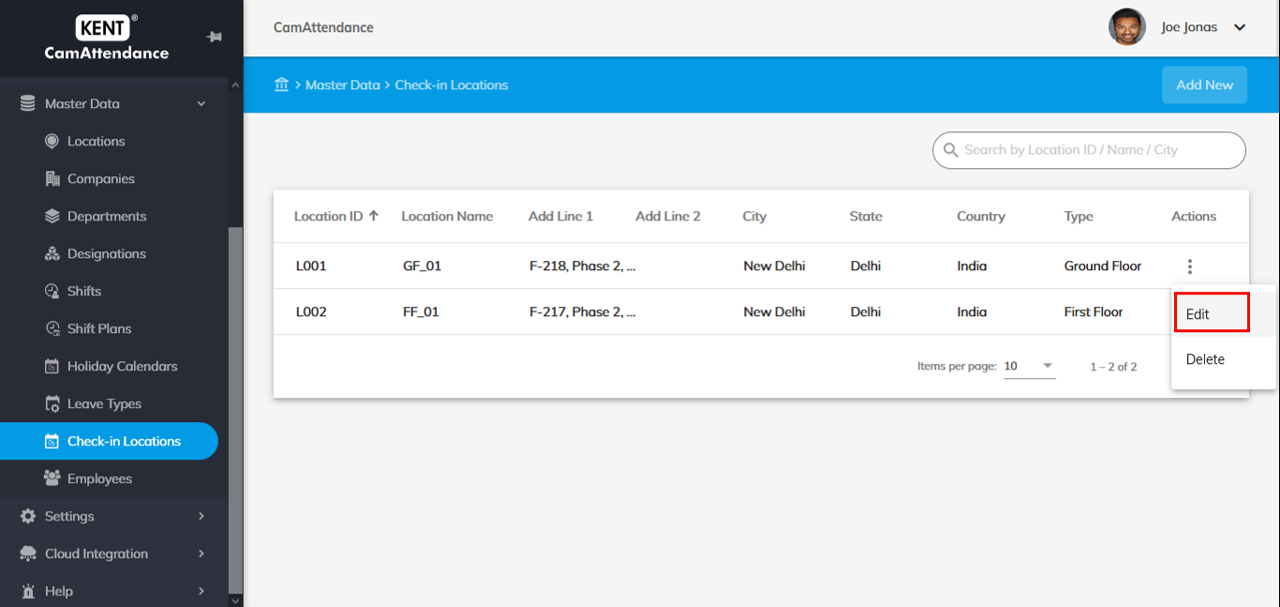
- Click Edit.
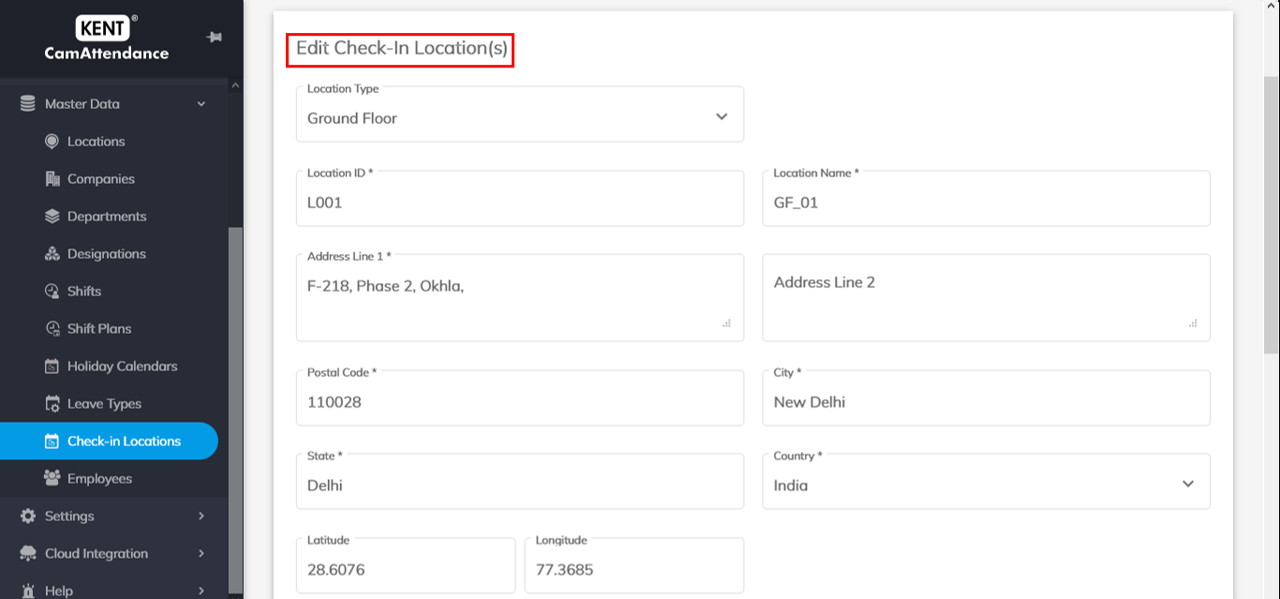
- Click Submit when you are done editing.
Deleting a Check-in Location
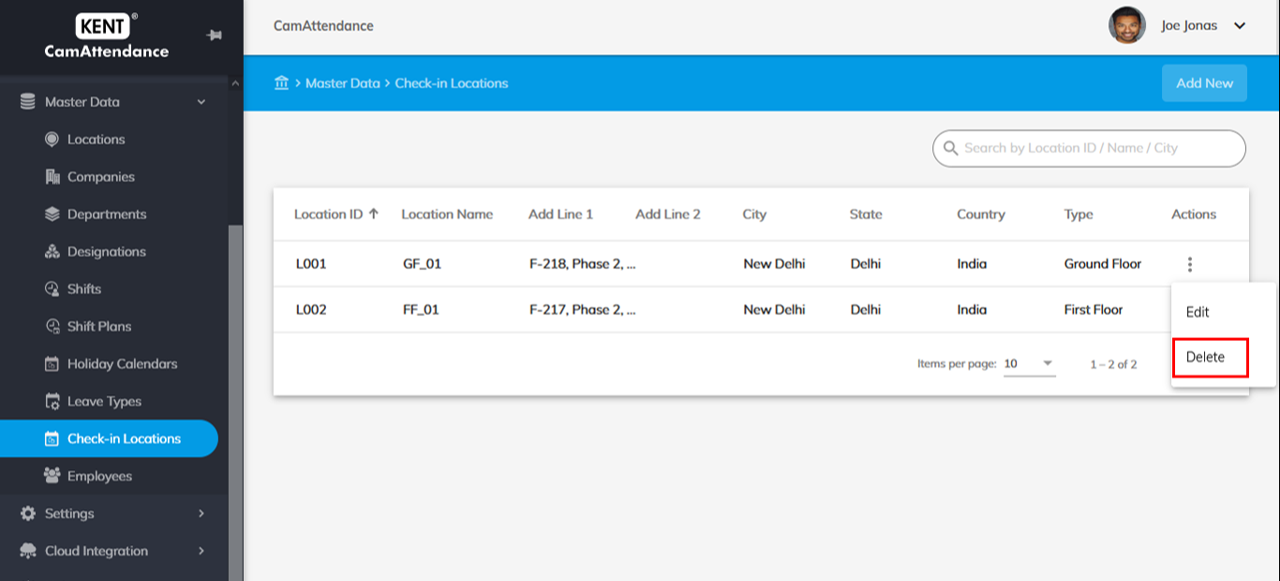
Follow the below mentioned steps to Delete a Check-in location.
- Go to Home>Master Data>Check-in Locations.
- Click on the three dots
 under Actions in front of the check-in location that you want to delete. Click Delete.
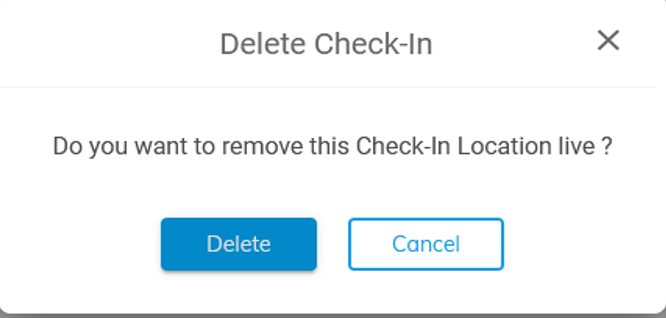
- A pop-up will appear asking you whether you really want to delete this Check-in location. Click Delete to delete and Cancel to go back.
Mapping Check-in Locations to Employees
Mapping check-in locations to employees provides employees the ability to check-in via app from certain pre-set locations on the portal. You can even enable an employee to check-in from any other random location aside from the locations that you have already set in the portal.
Step 1:
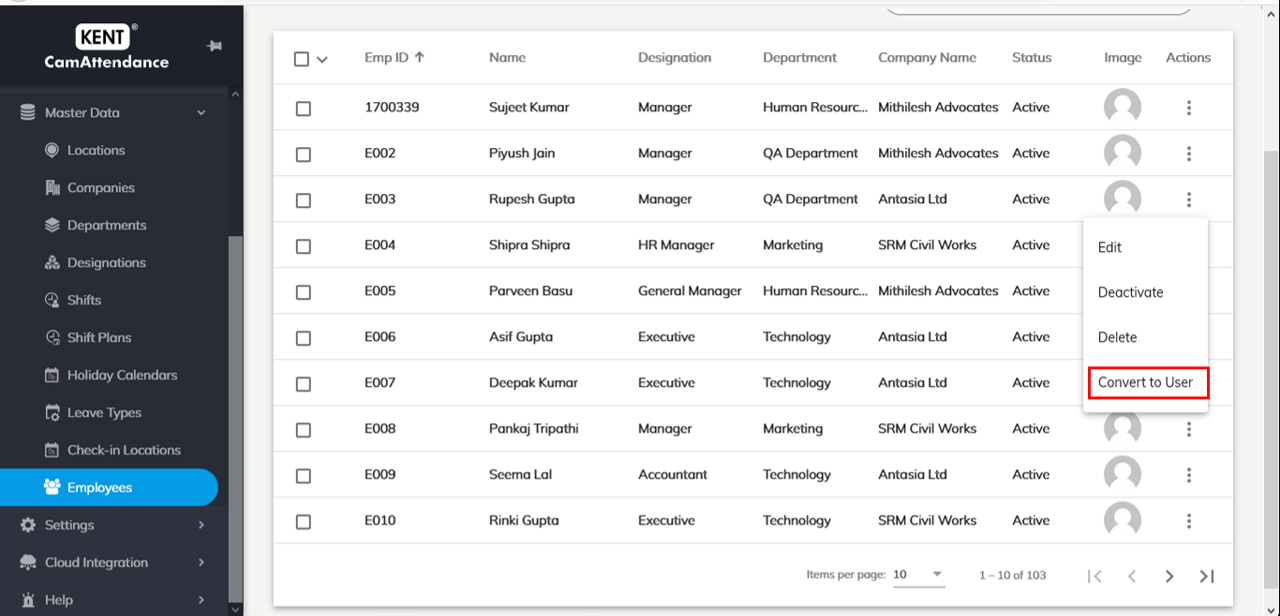
To map a check-in location to an employee, first convert that employee to a mobile app user.
- Go to Home>Master Data>Employees.
- Click on the three-vertical dots
 under Actions in front of the employee that you want to convert into a mobile app user.
 - Click Convert to user.
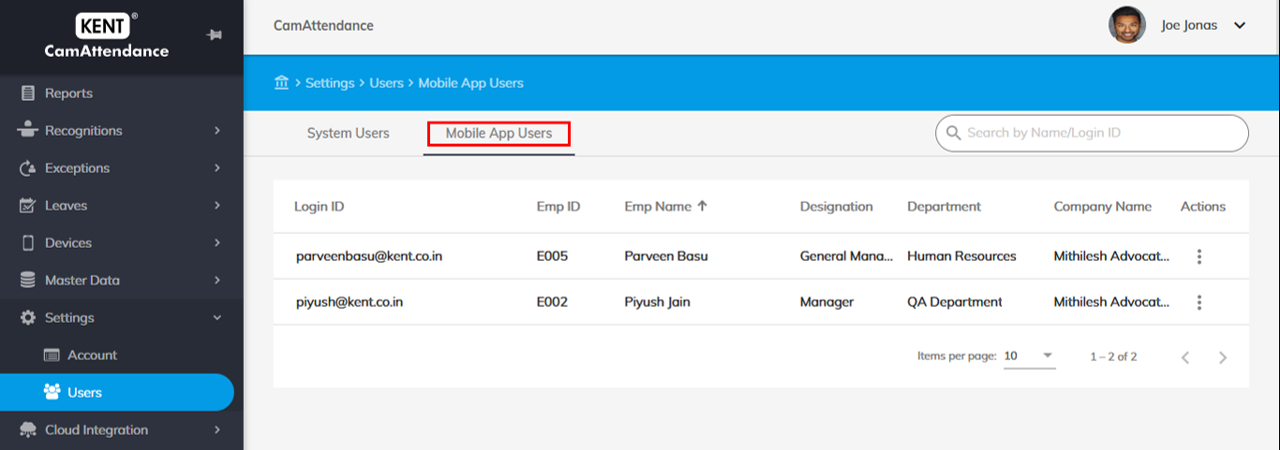
The employee that you have converted into a mobile app user can now check-in via CamAttendance Employee app. You can find the recently converted employees in Home>Settings>Users. Go to Mobile app users to see users you have converted into mobile users.
Now, you need to map that employee to the check-in location from where he or she will check-in.
Step 2:
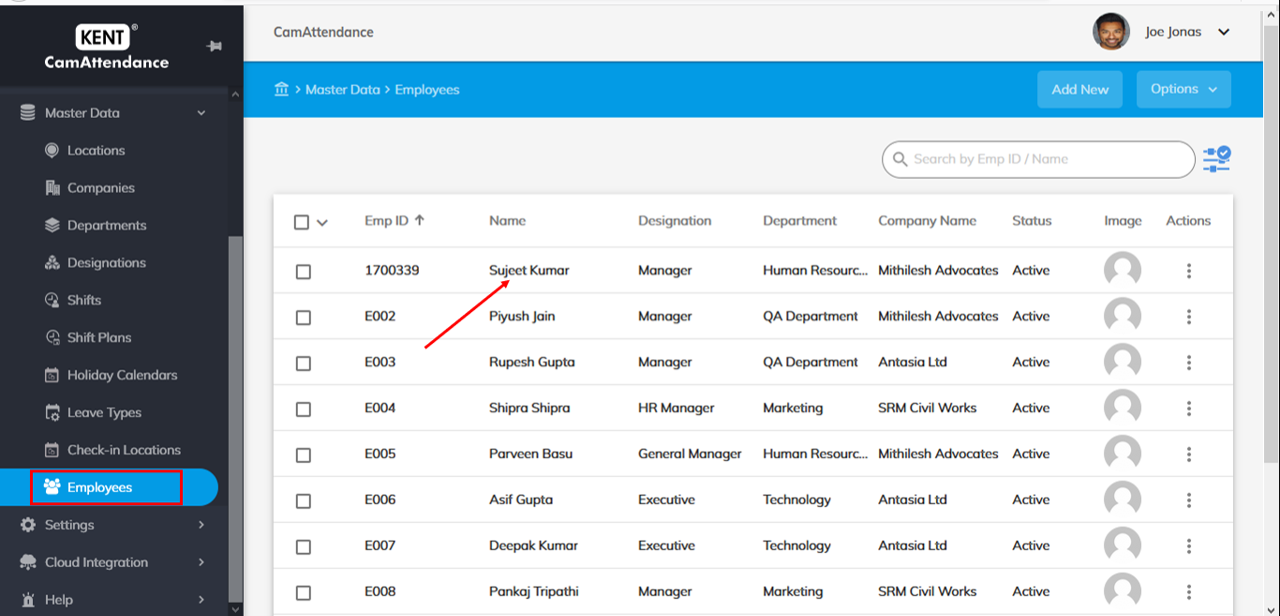
To map check-in locations to that employee, go to that employee in Home > Master Data > Employees.
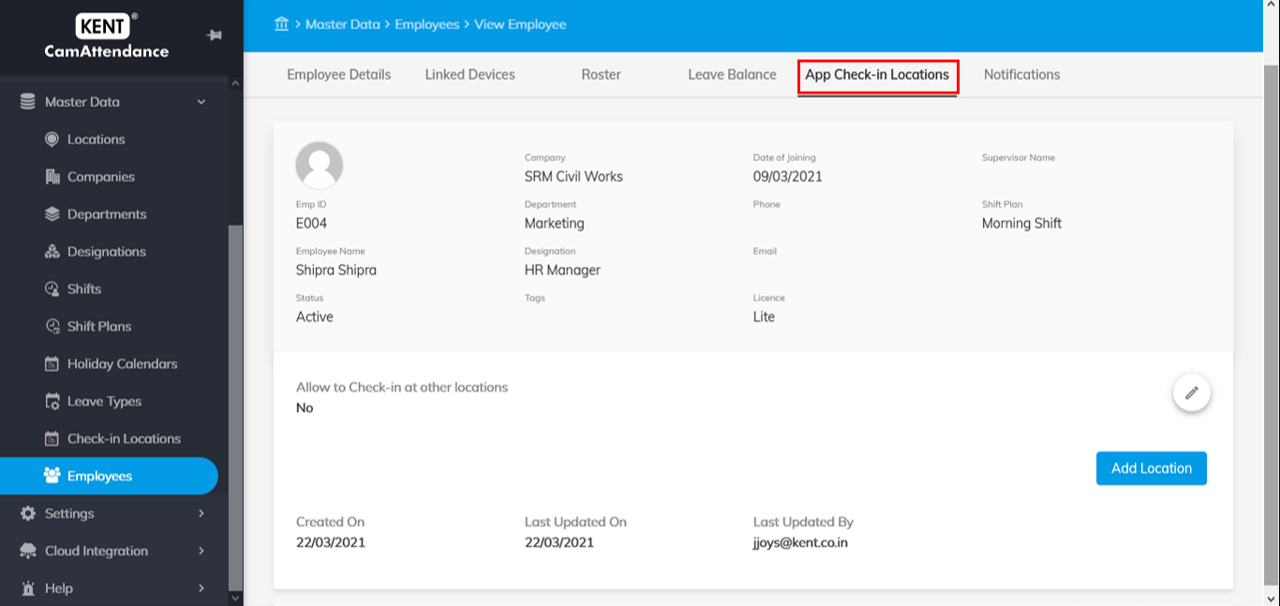
- Go to App Check-in locations.
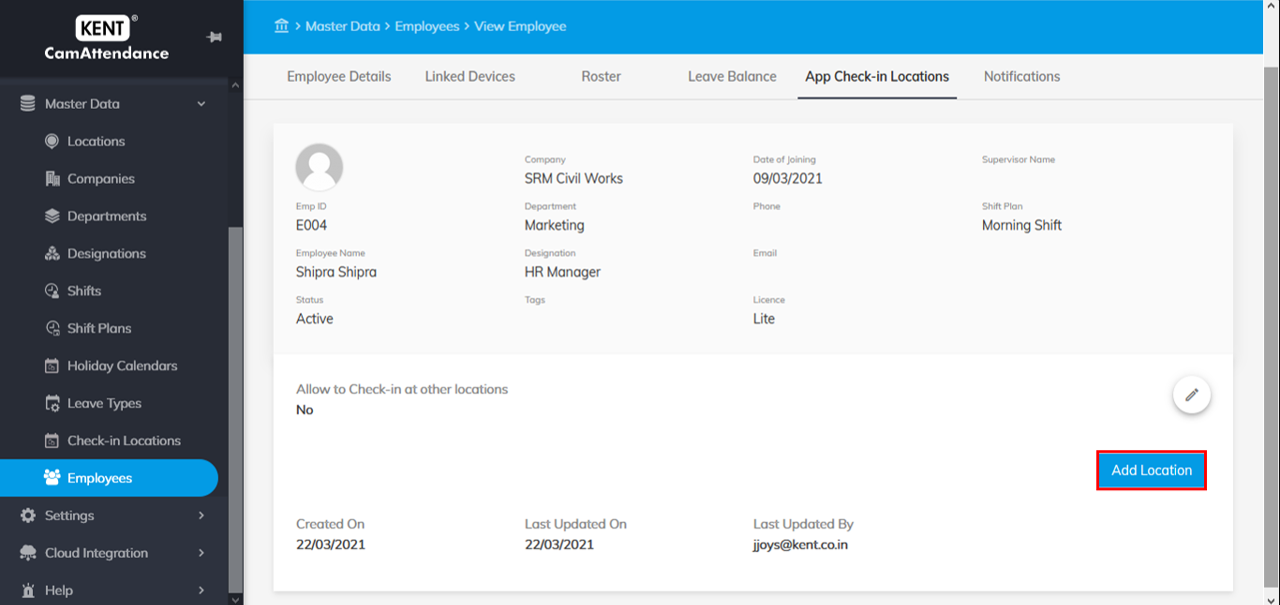
- Click Add Location to add check-in locations.
- Select the locations from where you want the employee to check-in and click Map to map the selected locations.

Step 3:
In case, you want to enable that employee to check-in from any other random location, click ![]() Edit icon in App check-in locations tab of that employee.
Edit icon in App check-in locations tab of that employee.
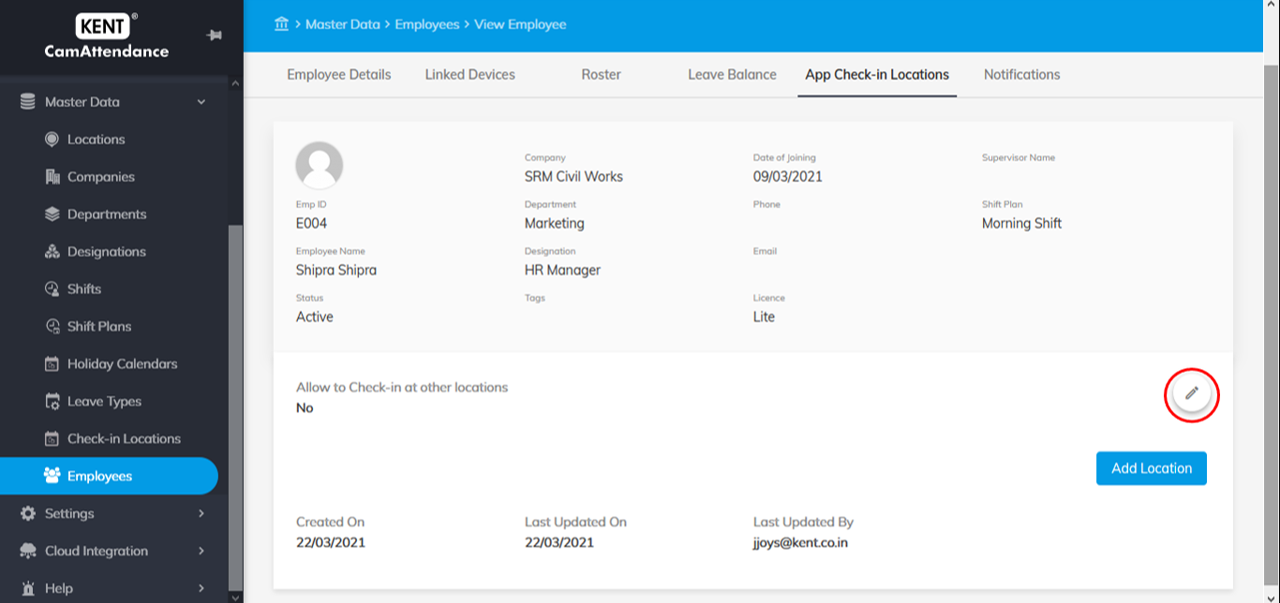
Check the box in front of Allow to check-in from other locations.
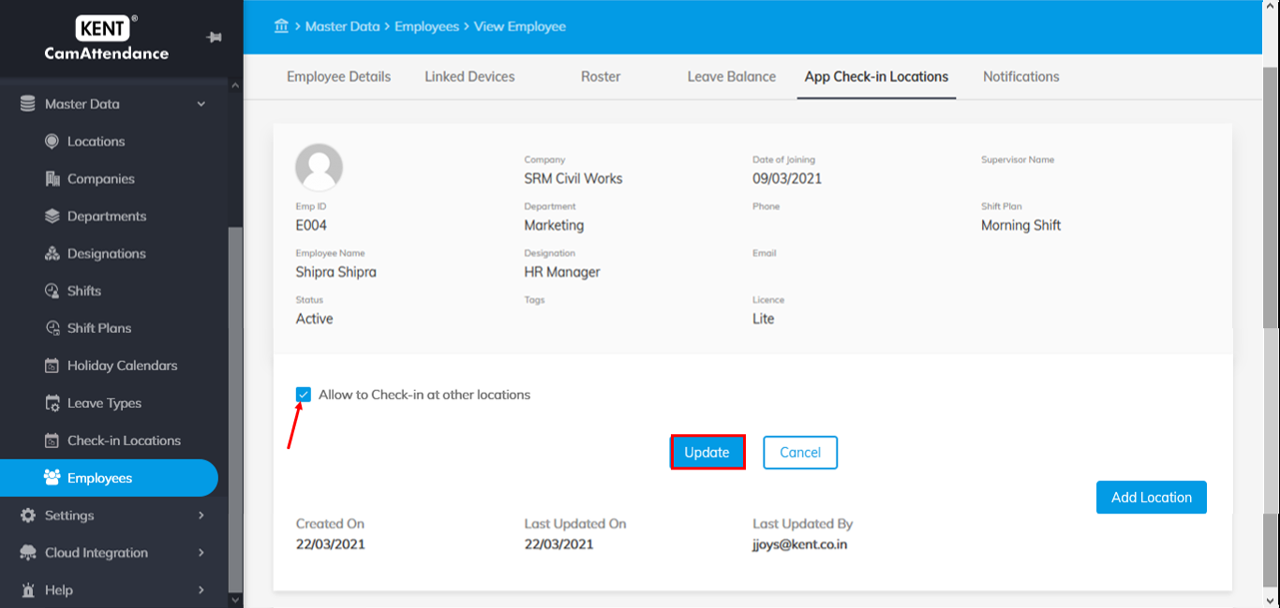
Once you are done, the employee can check-in from any random location via GPS tracker on CamAttendance employee mobile application. The employee app will capture the location automatically via GPS tracking.
See transactions data of employees checking-in from the app
The transactions data of employee checking-in or checking-out can be seen in recognition logs.
To see recognition data of those checking-in from employee app:
- Go to Home > Recognitions > Employees.
- Select a period from the calendar for which you want to see transactions data. Click on Start Data and End Date to select a period.
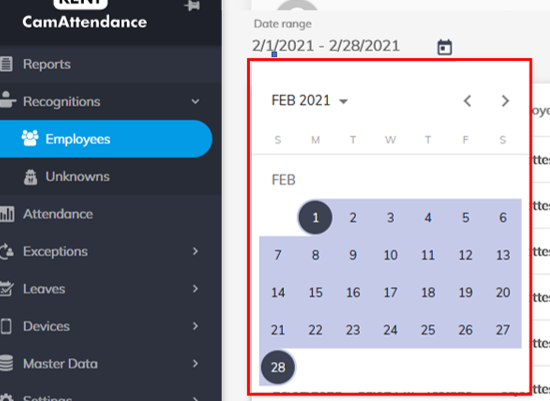
You can see all employee transactions data here.
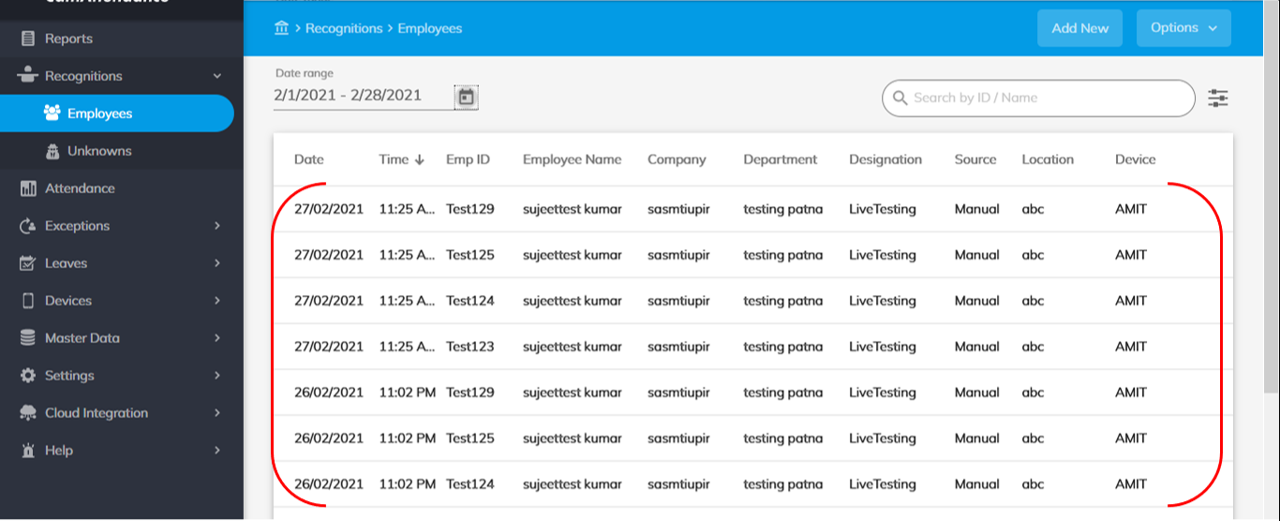
- In Source located at the top, you can find all employees checking-in from multiple sources.

Source can be of three types:
- Manual – Source will be Manual in case you are manually uploading the transactions data.
- Device – Source will be Device in case the employee has marked attendance from a device.
- App – Source will be Employee app in case the employee has marked attendance from the Mobile app.
To filter those checking-in from the app:
- Click
 Filter icon located in the top right-hand corner.

- Select Source and check the box in front of App option.

- Click Apply to filter employees checking-in from the app.
See also: