Introduction
The Kent CamAttendance Application allows the admin user to manage the shift plans in a more effective manner. It makes Shift Planning and Scheduling more flexible.
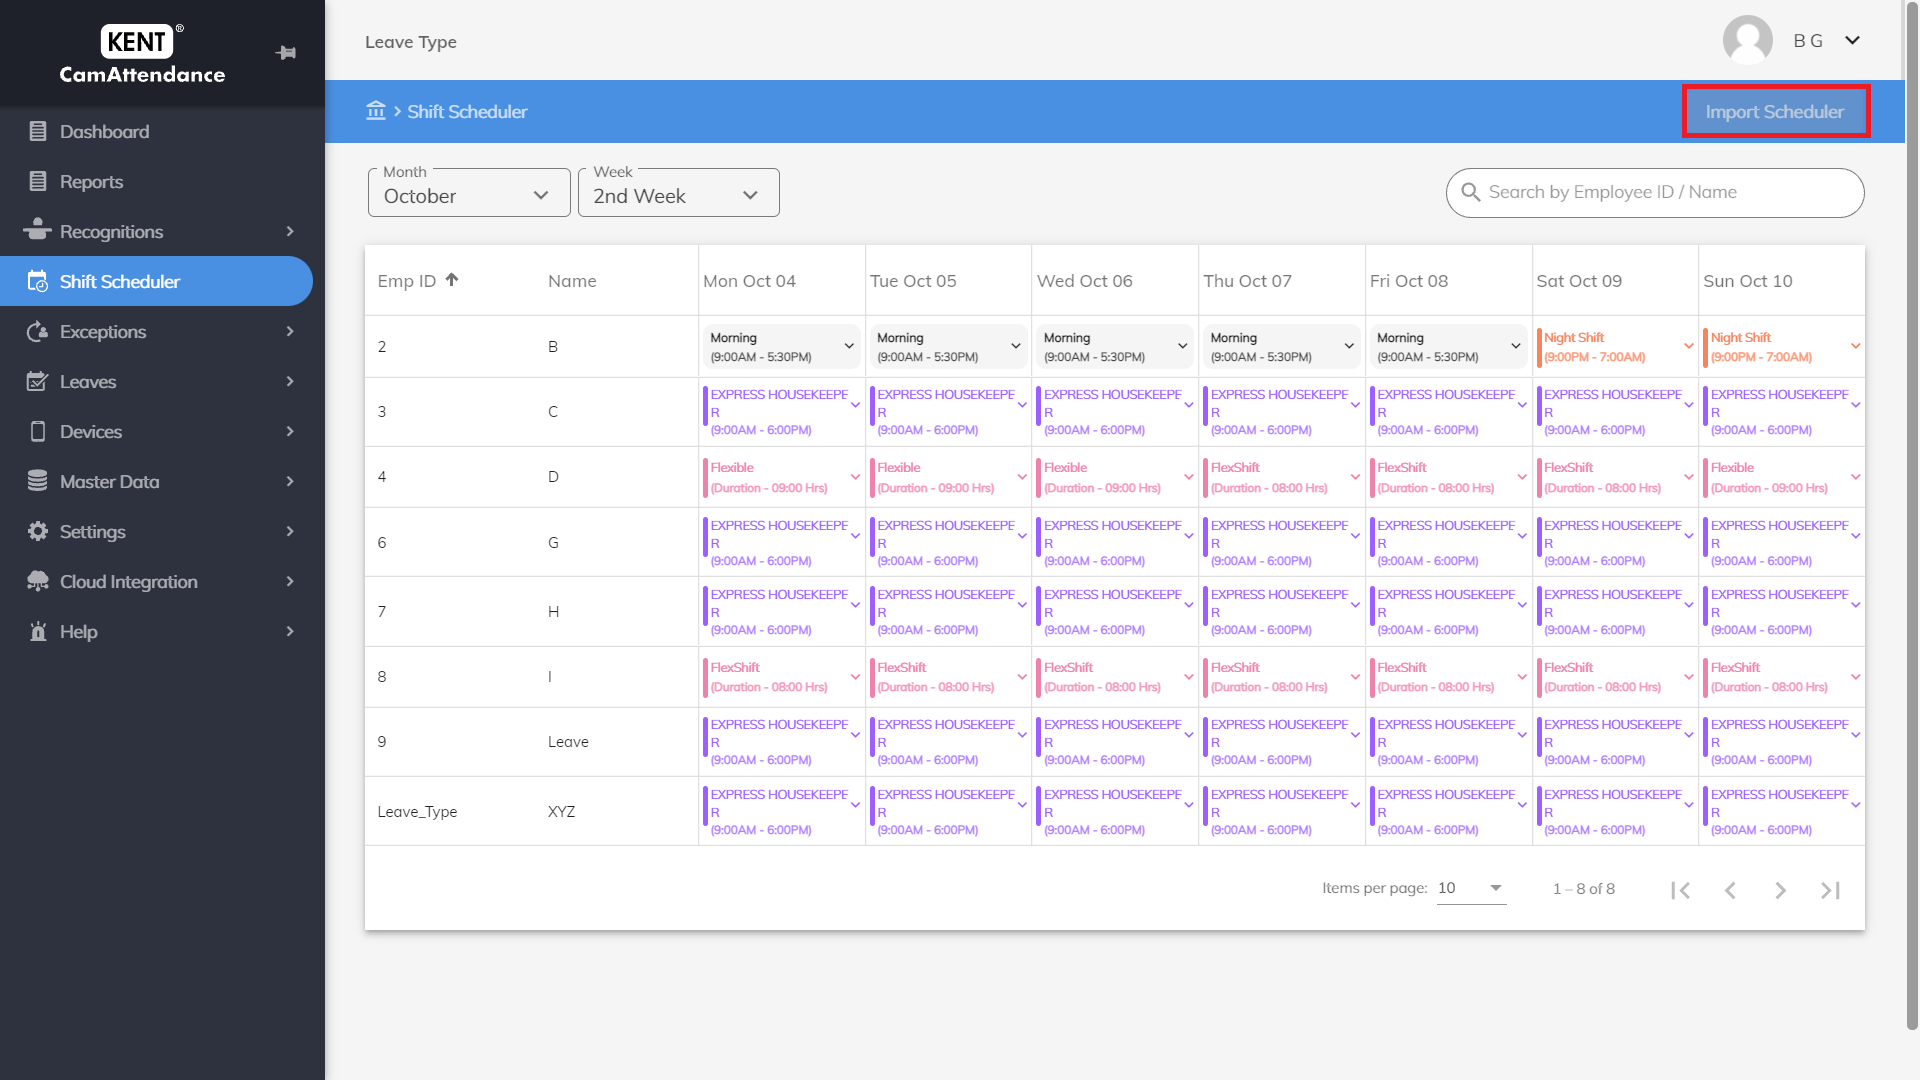
The new updated version provides Shift Scheduler option which basically redirects the admin to a dashboard where all types of shift plan of the employees working in the company are clearly visible.
The dashboard provides information of the shift plan according to Month and Week wise parameters.
The admin user can also modify the shift plan of a particular employee from the dashboard only and the Working hours and the Exceptions according to the modified shift plan will be enabled for that particular employee.
If the admin wants to edit or modify shift plans of multiple users then the same can be done by importing the file and the updated records will be saved and enabled.
To import the file,
- Click on Import Scheduler on the left side
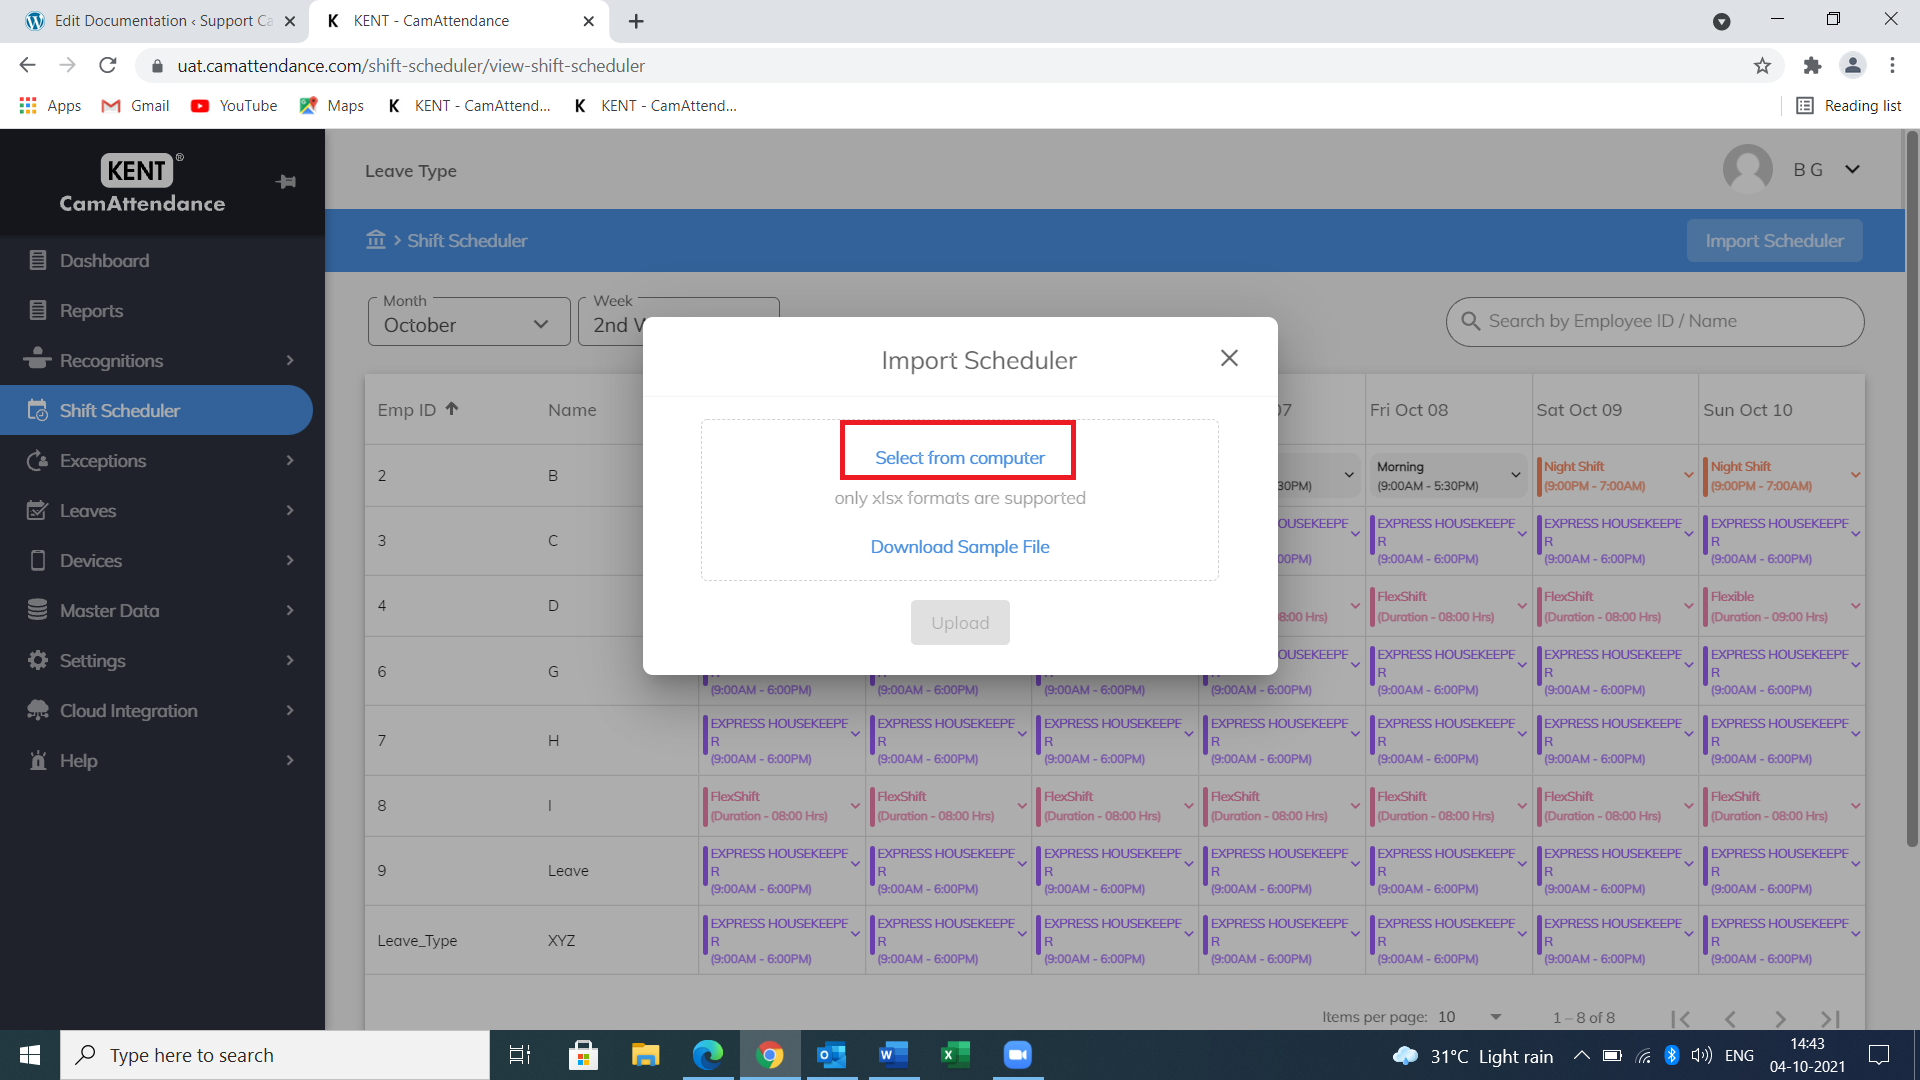
2. Click on Select from Computer option and import the data present in the Excel sheet.
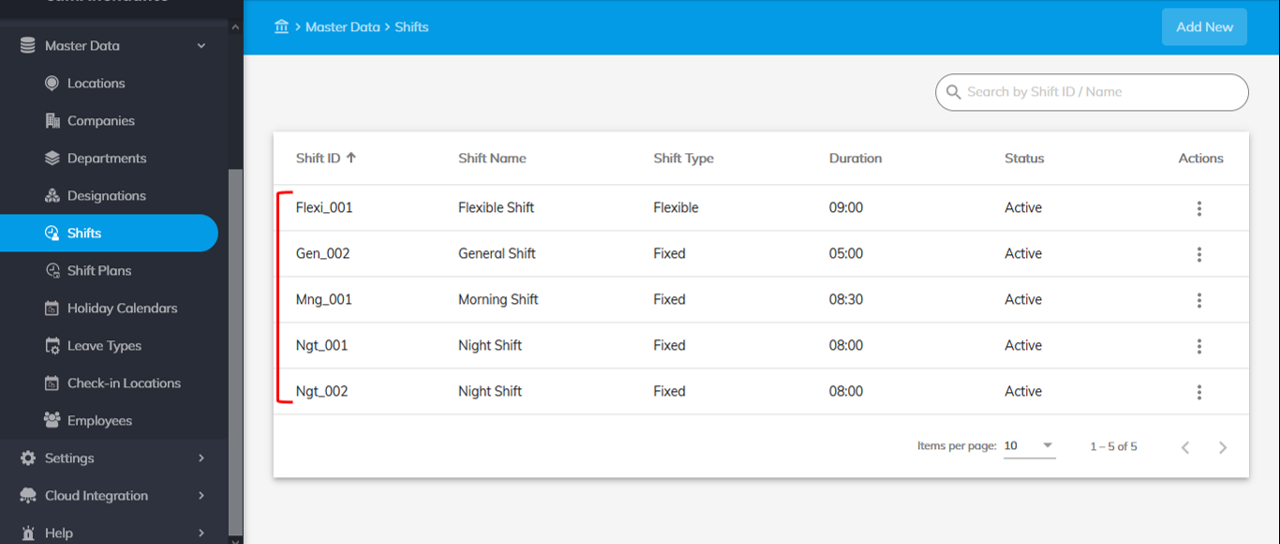
Shifts enable an admin user to add different shifts and schedules that they have set-up in their company. For example, Morning, Afternoon, Night, or Evening shifts.
Admin users can create multiple shifts depending on the need and requirements.
Creating a Shift
To create Shifts:
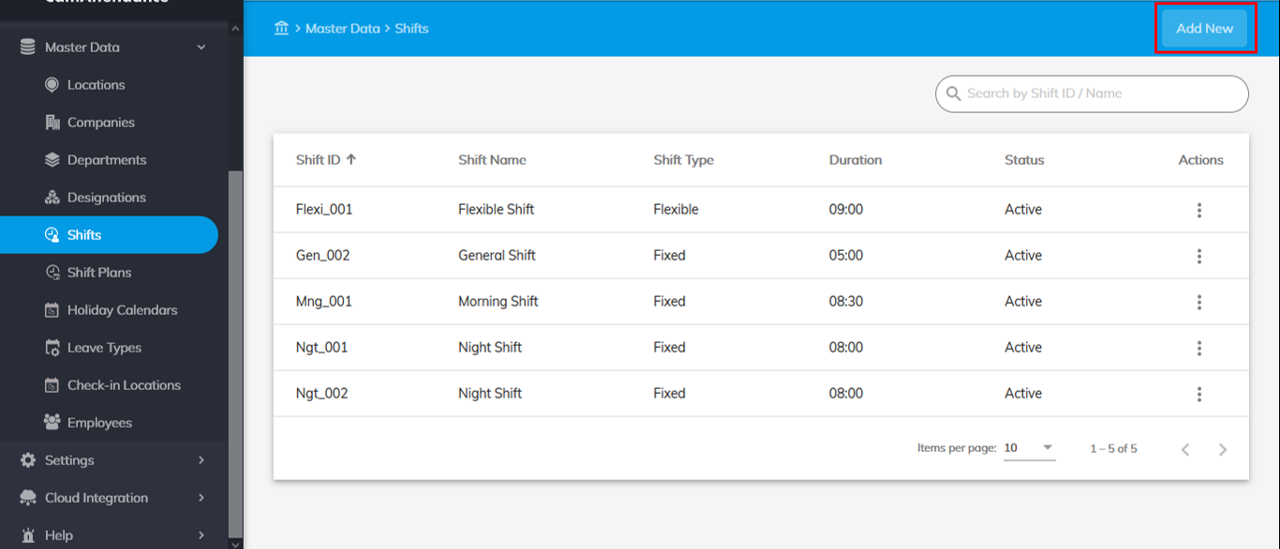
- Go to Home>Master Data>Shifts.
- Click Add New in the top right-hand corner of your screen.
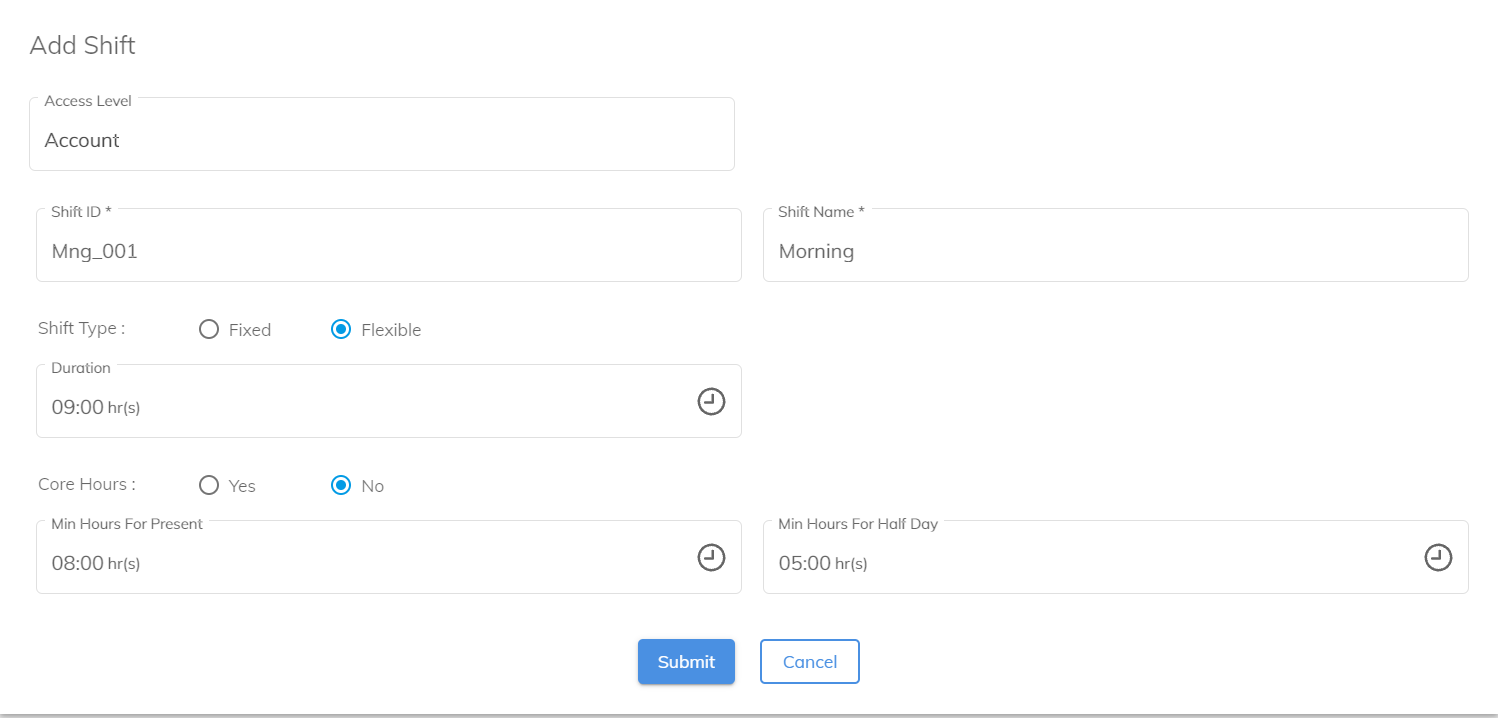
- Enter a Shift ID.
For example, for Morning shift – ID could be Mng_01.
for Night shift – ID could be Ngt_01.
- Enter a Shift Name, for example, Morning, Night, etc.
- Choose a Shift Type – is it Fixed or Flexible?
If the Shift is Fixed –
- Choose Start Time and End Time of the shift by clicking the clock.
- Duration will automatically be updated by the system depending upon the timings you pick.
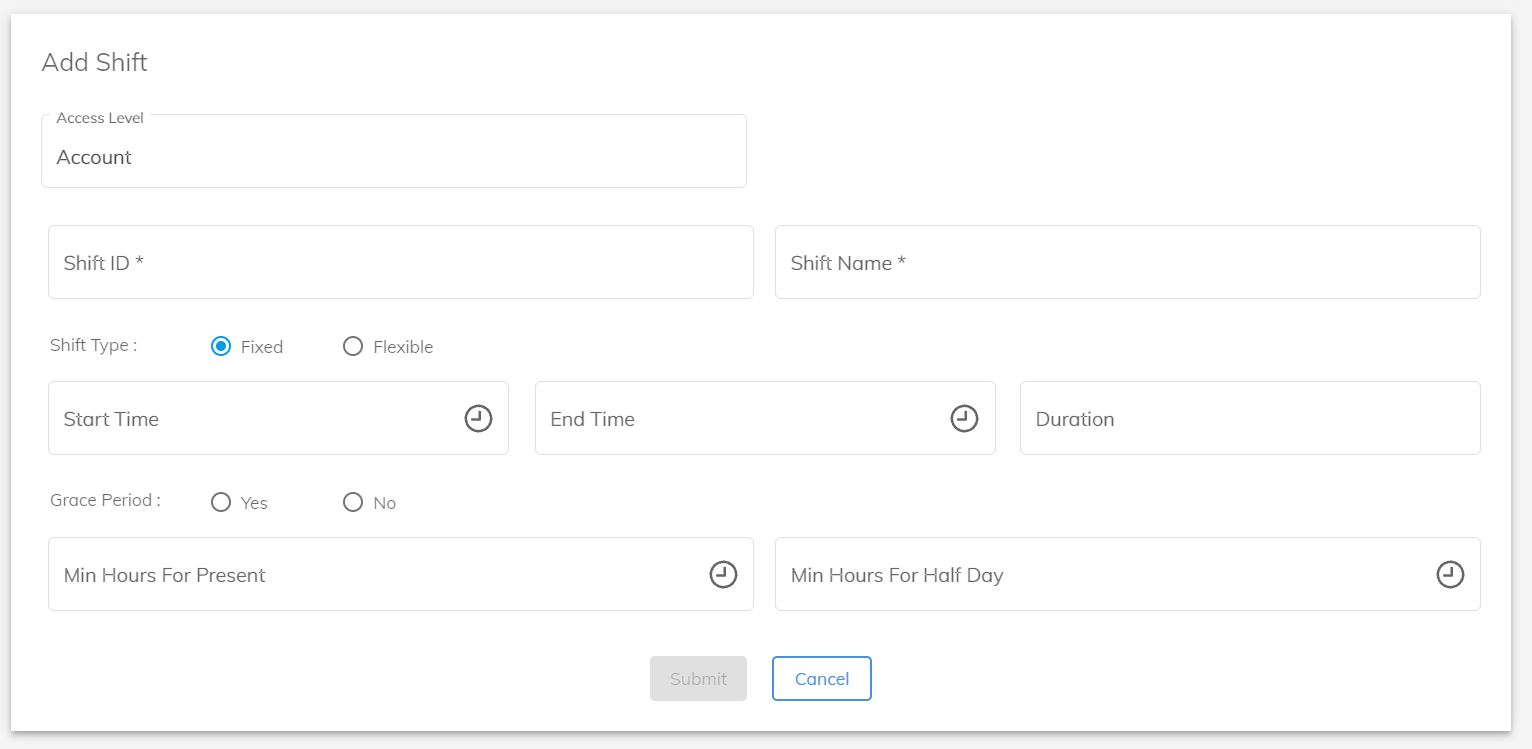
- Choose Yes if Grace Period is applicable and No if it is not applicable.
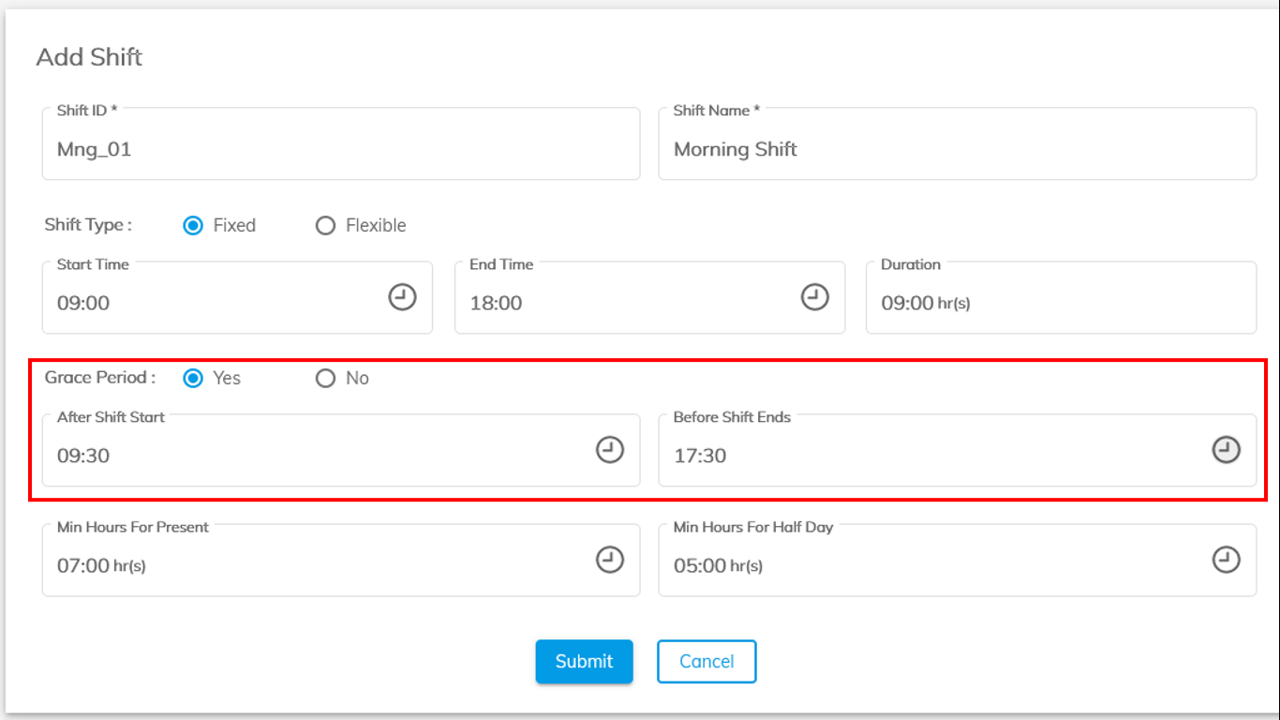
- If Grace Period is applicable –
-
- Select Start time on the clock when the shift will start adding Grace period to it. This will be your After Shift Start.
- Select End time when the shift will end adding Grace Period to it. This will be your Before Shift Ends.
- Select minimum number of hours on the clock required to mark as Present.
- Select minimum number of hours on the clock required to mark a Half day.
- Now, click Submit.
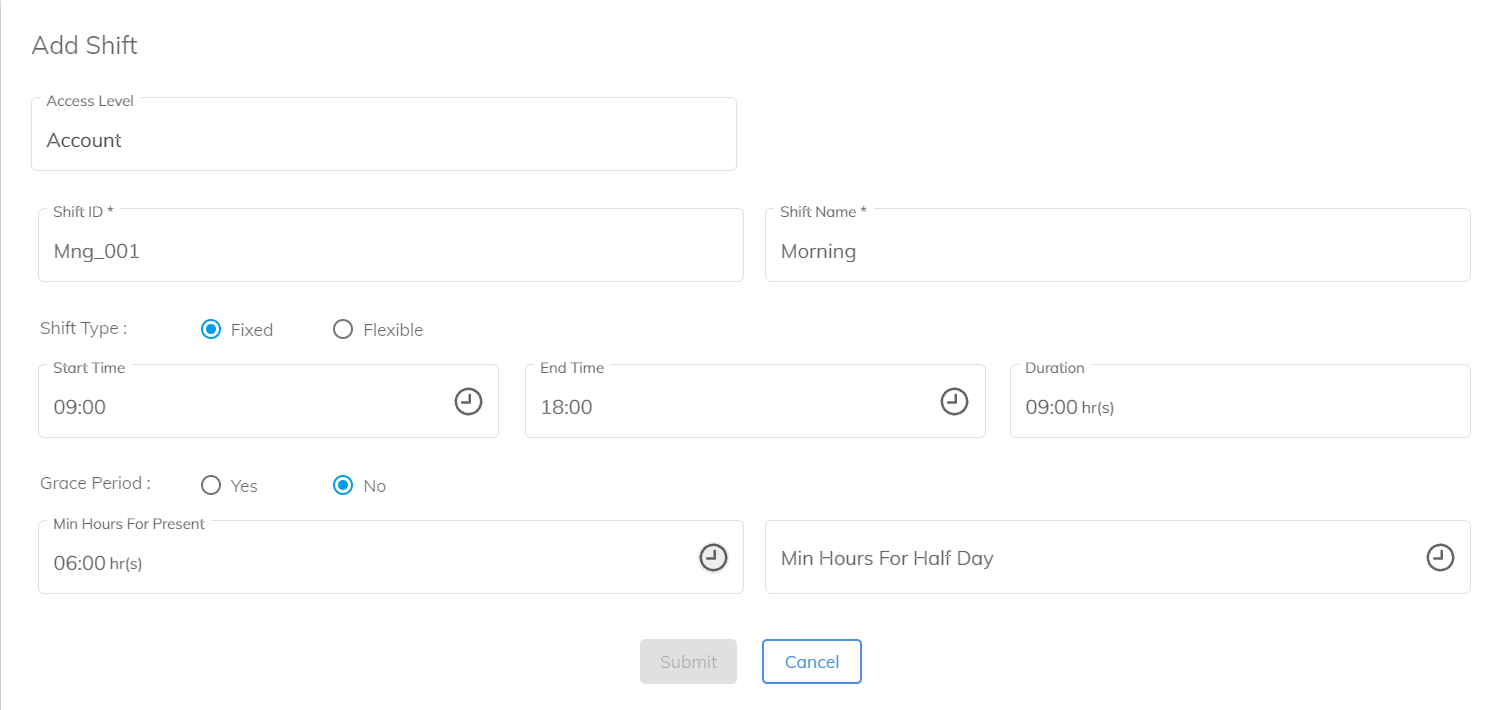
- If Grace Period is not applicable –
- Select minimum number of hours on the clock required to mark as Present.
- Select minimum number of hours on the clock required to mark a Half day.
- Now Click Submit.
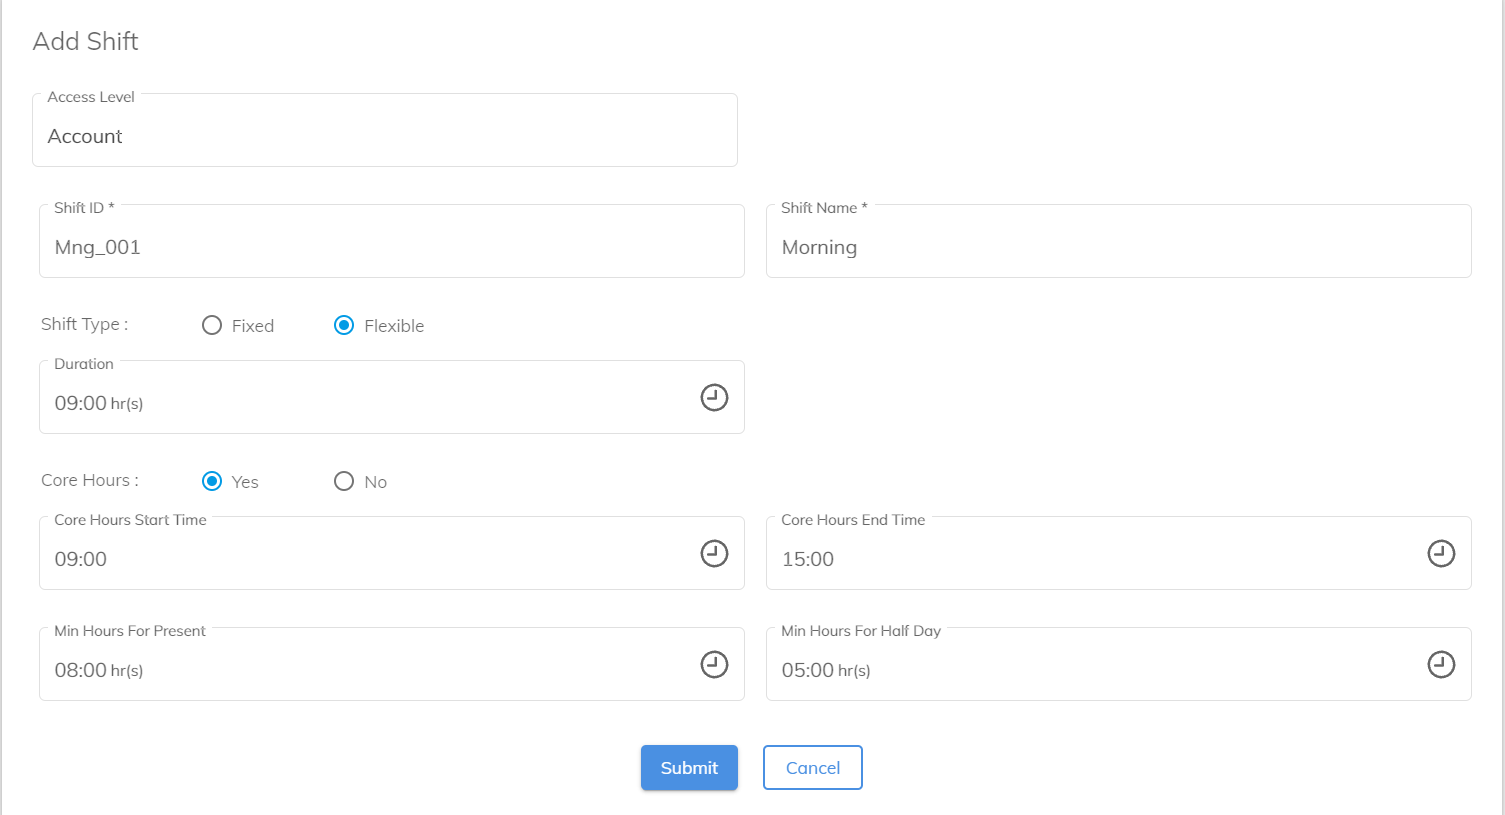
If the Shift is Flexible –
- Choose Yes.
- Select duration of shift on the clock.
- Choose a Core Hours Start Time and End Time. Core hours are the number of hours during which an employee must be in the office.
- Select minimum number of hours on the clock required to mark as Present.
- Select minimum number of hours on the clock required to mark a Half day.
- Now click Submit.
If the Shift is not Flexible –
- Choose No.
- Select duration of shift on the clock.
- Select minimum number of hours on the clock required to mark as Present.
- Select minimum number of hours on the clock required to mark a Half day.
- Now, click Submit.
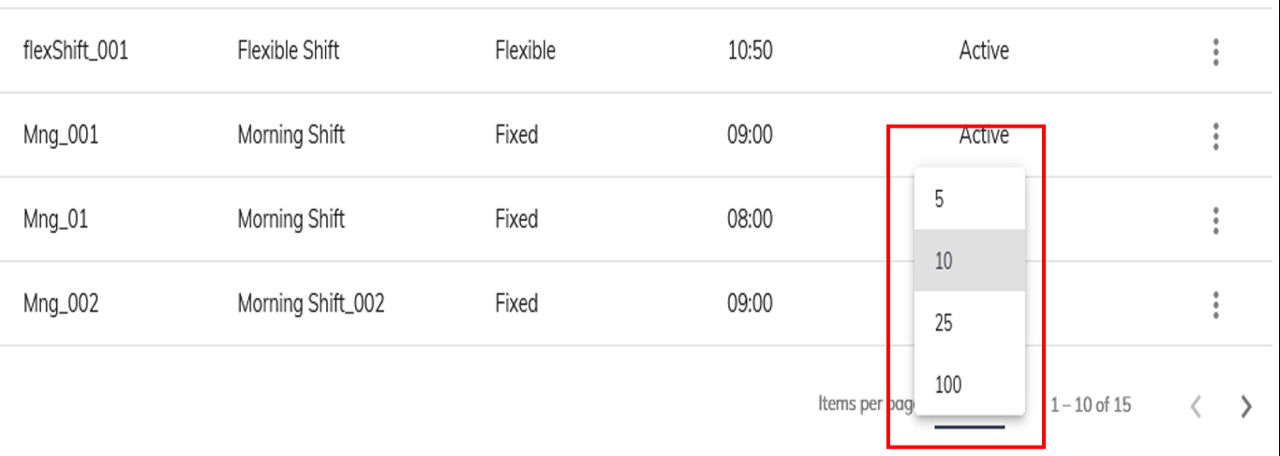
In Home>Master Data>Shifts, you can add multiple shifts and select the number of shift entries you would like to see per page by clicking the dropdown in the bottom right-hand corner.
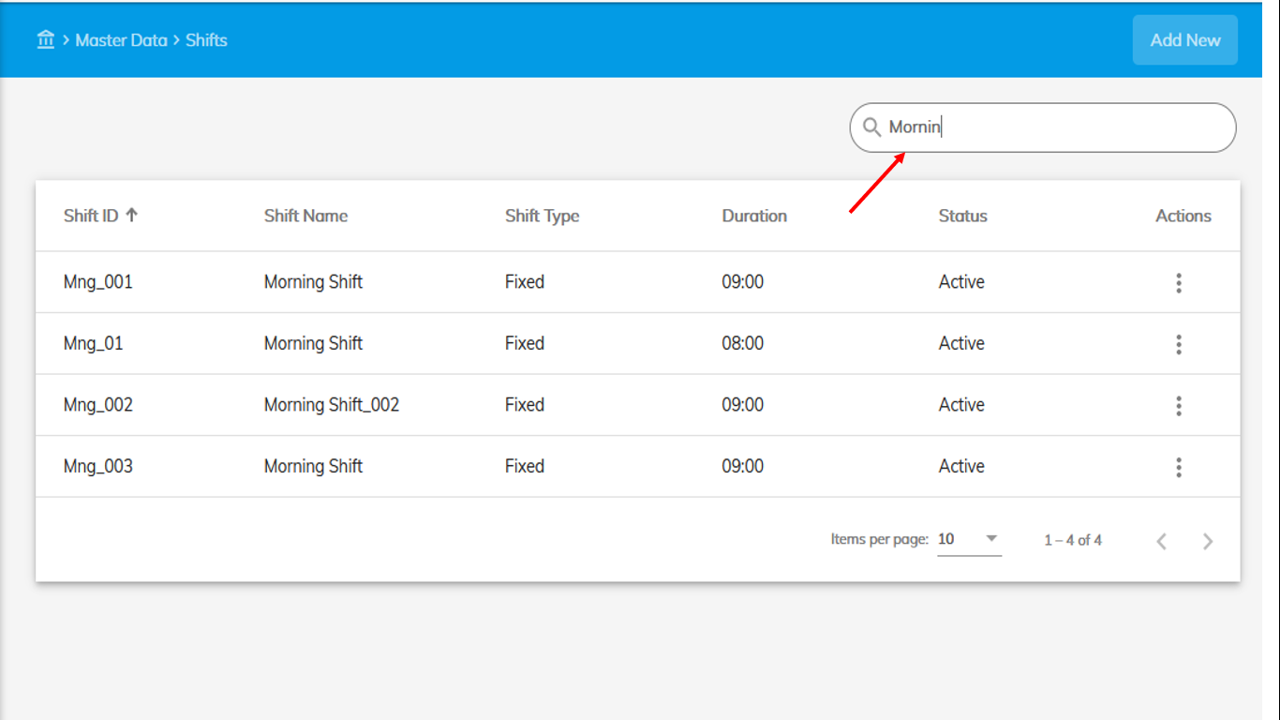
Search a shift by Shift ID/Name if you want to find a particular shift from the list.
Editing a Shift
Follow the below mentioned steps to Edit a shift. You can edit a shift in two ways.
To edit a Shift:
- Go to Home>Master Data>Shifts.
- You will be able to see a list of shifts that you have created already.
- Click on three vertical dots under Actions in the right-hand side of your screen.

- Click Edit.
- Edit the shift values and once you are done, click Submit.
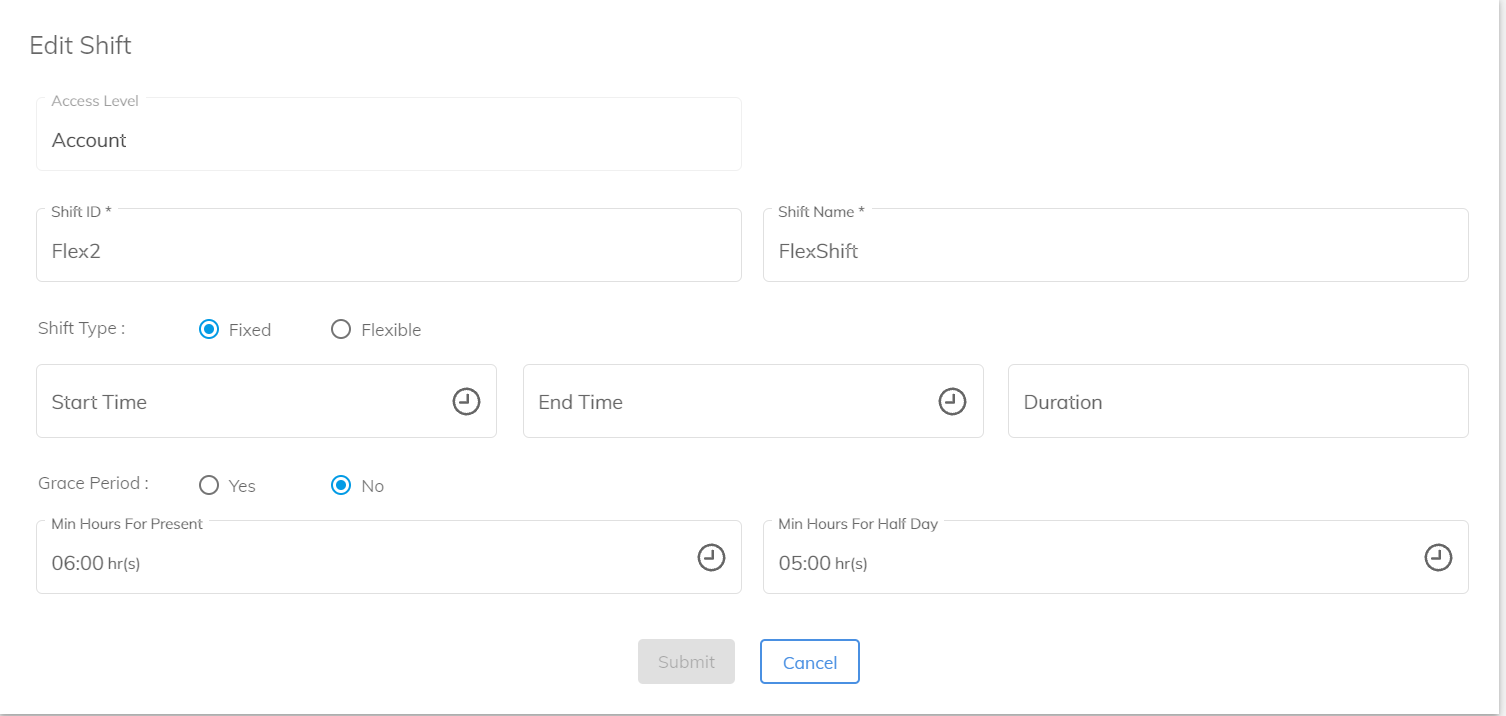
Another way to edit a shift is by clicking on the shift itself.
- Click on a shift in the list that you want to edit.
- Click on
 symbol to start editing a shift.
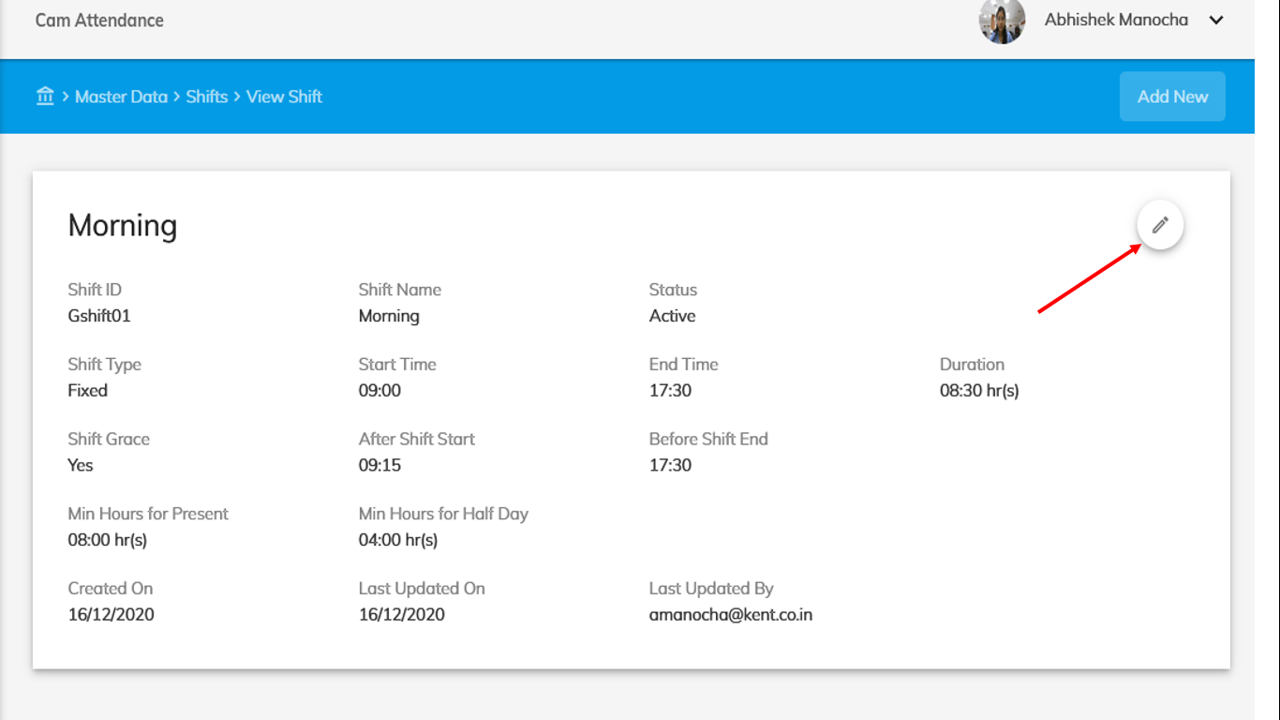
- Click Submit when you are done.
Deleting a Shift
Follow the below mentioned steps to Delete a shift.
To delete a Shift:
- Go to Home>Master Data>Shifts.
- You will be able to see a list of shifts that you have created already.
- Click on three vertical dots under Actions in the right-hand side of your screen in front of the shift you want to delete. Click on Delete.
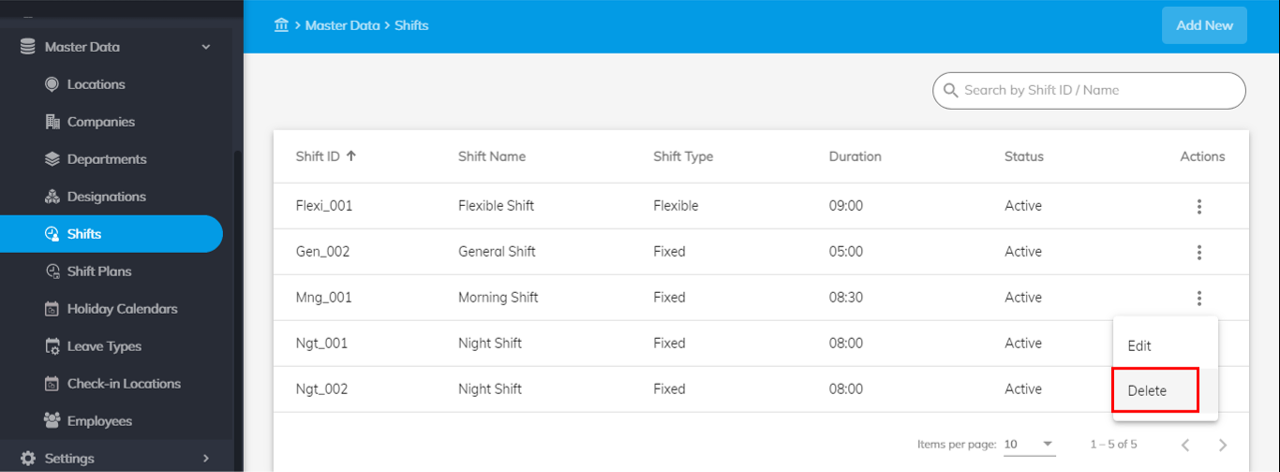
- A popup will appear asking you whether you really want to delete this shift.
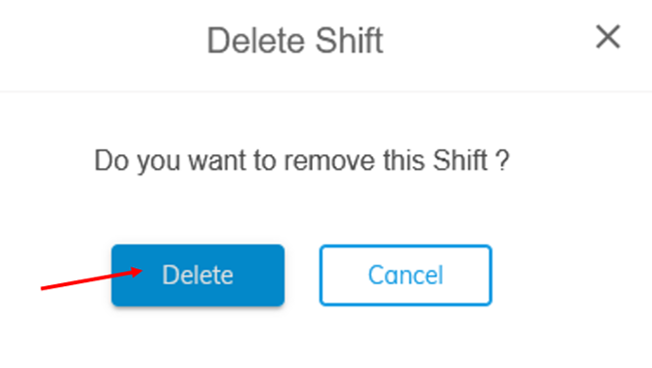
- Click Delete to delete a Shift or Cancel to go back.
Note: A shift can not be deleted if it is already mapped with a Shift Plan.
Next Steps: