- Introduction
- Leave Types
- Adding a Leave Type
- Editing a Leave Type
- Deleting a Leave Type
- Leave Transactions
Introduction
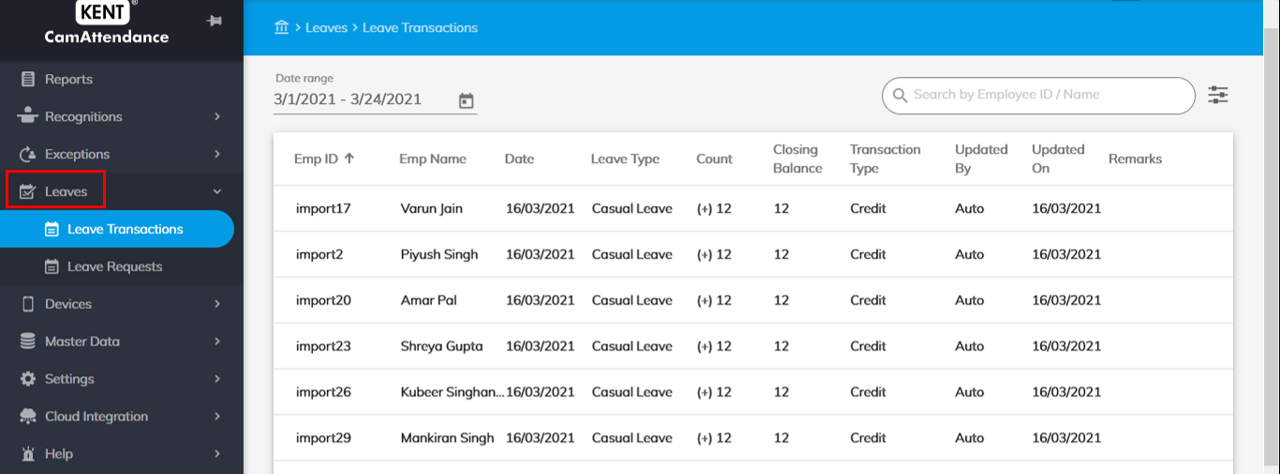
In Leaves, you can see all leave transactions data generated by the system. As soon as you configure all the different types of leave types, leave transactions data is generated by the system, which can be seen in the Leave Transactions. Depending on the set conditions in the Leave Types, leaves are mapped to employees by the system falling in that criteria.
Leave Types
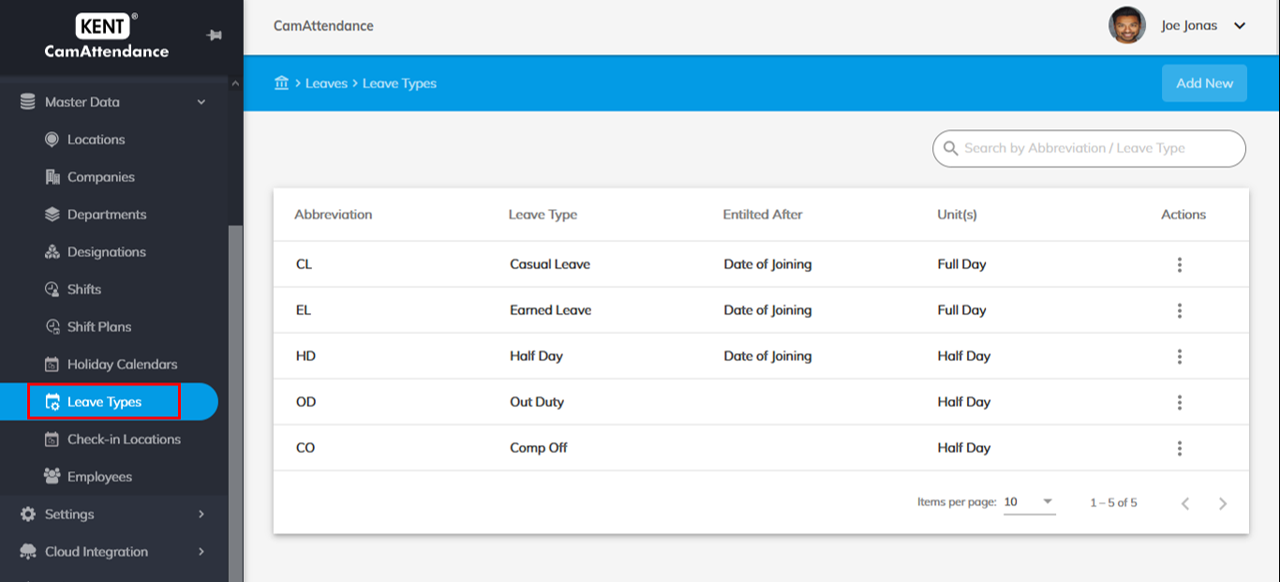
In Leave Types, you can define the many different types of leaves you may have set across your organization. You must have defined all the leaves in the Leave Types in order to assign leaves to the employees.
- In the Leave Type section, where the Access Control was initially set to Account by default can be now chosen from the drop-down menu consisting of other 2 options namely Company and
- The Admin now can easily manage data according to a particular employee and the data can be easily accessed at various levels.
Adding a Leave Type
Follow the below mentioned steps to add a leave type.
- To add a leave type, go to Home>Master Data>Leave type.
- Click Add New in the top right-hand corner of your screen.

- Enter an Abbreviation* for the type of leave you are creating. For example, for Casual Leave, it can be CL, etc.
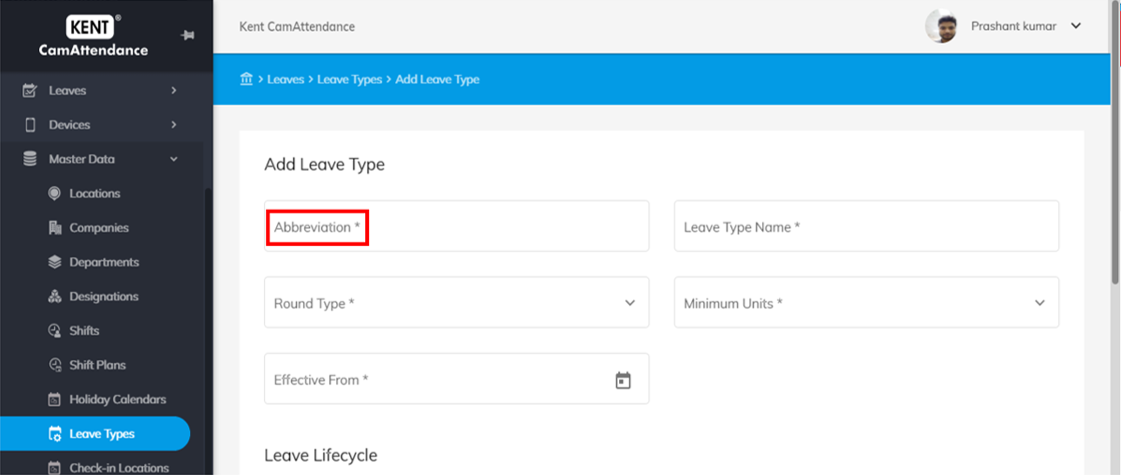
- Enter Leave Type Name*, for instance, Casual Leave, Sick Leave, Earned Leave, etc.
- Select whether this leave type will be Round up, Round down or Nearest.
Nearest – In the Nearest, you need to see the last digit after decimal point. If it is greater than 5, round it to the nearest higher whole number. Else, round it to the nearest lower whole number. For example, if you are taking the Nearest of 3.5-3.9, it will become 4. For any number between 3.1-3.4, it will become 3.0.
Round up – You round the number to the nearest higher whole number. For example, if you are taking a round up figure of 3.3, it will be 4. In simple words, for 3.1 – 3.9, round up will be 4.
Round down – You round the number to the nearest lower number. For example, if you are taking a round up figure of 3.7, it will be 3. In simple words, for 3.1 – 3.9, round down will be 3.
- Enter Minimum Units* employees can avail when taking a leave. For example, if you select minimum units to be Half Day for a Casual Leave type, the employees have the option to avail a half-day. In other case, if you select Full Day here, the employees can avail a full day leave only. A half-day will not be considered as a leave in that case.
- Select a date by when you want this specific leave type to take effect by clicking the calendar.
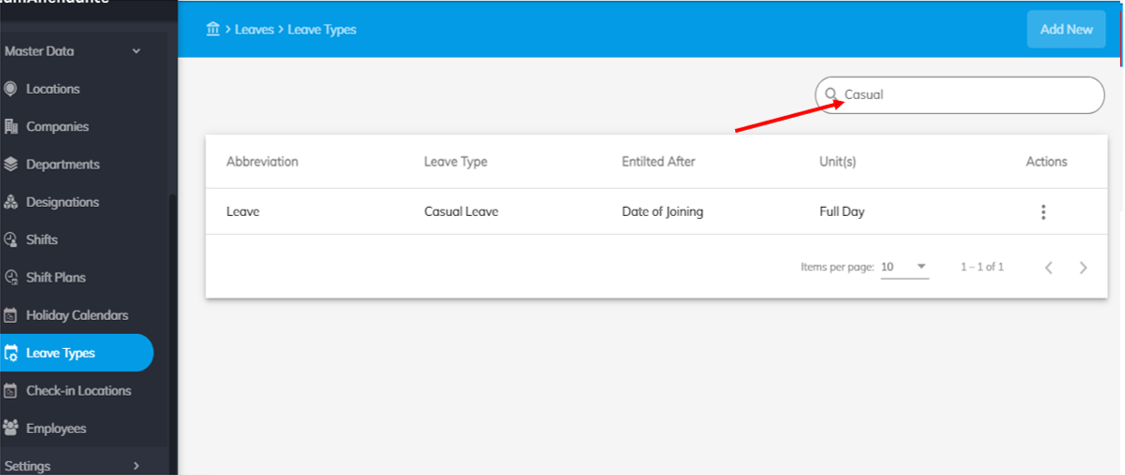
- Search in the list of Leave types by Abbreviation/Leave type to search for a particular leave type.
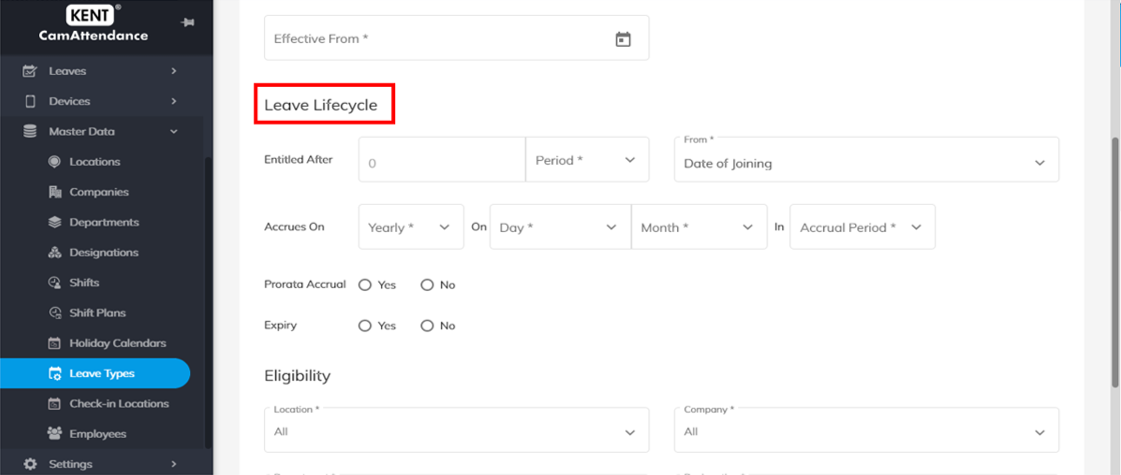
- To define a Leave lifecycle, enter a period by when this leave type will be entitled to the employee from the day of joining.
- Select a period from the dropdown. You can set the accrual period to yearly, half-yearly, quarterly, monthly, or one-time.
- Select the Day*, Month*, and Accrual Period*e., whether this accrual will take place in the current year or the next year (Accrual is the accumulation of leaves over a period of time. Select a period from the dropdown. You can set the accrual period to yearly, half-yearly, quarterly, monthly, or one-time. The person is entitled to receive a certain number of leaves within the set accrual period, which will be renewed once the period is over).
- Choose Yes if this accrual is on a Pro-rata basis and No if it is not. Pro-rata is the amount of calculating something such as leaves, or other benefits for a smaller period in relation to a larger period.
For example, an employee joins on March 1. The total number of CL leaves a company gives is 20 on a yearly basis. For an employee joining on March 1, total number of leaves would be – 20/365 * 306 (no. of days left in the year) = 16.7 leaves. If you have selected round up, this figure will become 17. If you have selected round down, this figure will become 16. If you select Nearest, it will round to the nearest possible number (depends on whether you select a half-day or full day in the Minimum Units to define a leave. If you have selected a half day, 16.7 will round to 16.5, however, if you have selected a full day, it will round to 17). We suppose you select round down, and the leaves become 16, applicable for 306 days. This means, a candidate is entitled to receive 16 leaves for the remaining period.
In another case, if your calculation comes down to 16.5 and you select Nearest, it will round to 17, else if your leave calculation comes down to 16.4, it will round to 16.
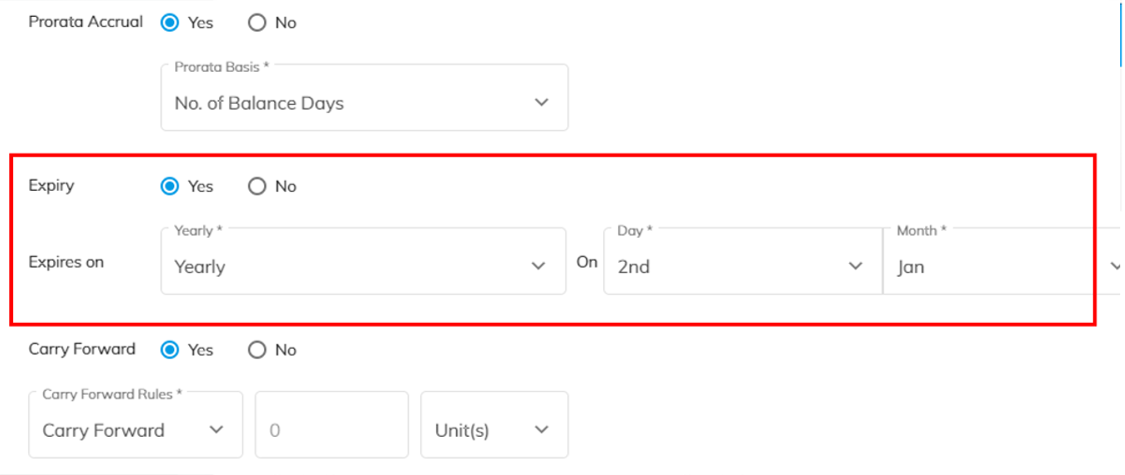
- Choose Yes if this leave type has an expiry and No if it does not.
- Select a period, day, and month after which this leave will expire.
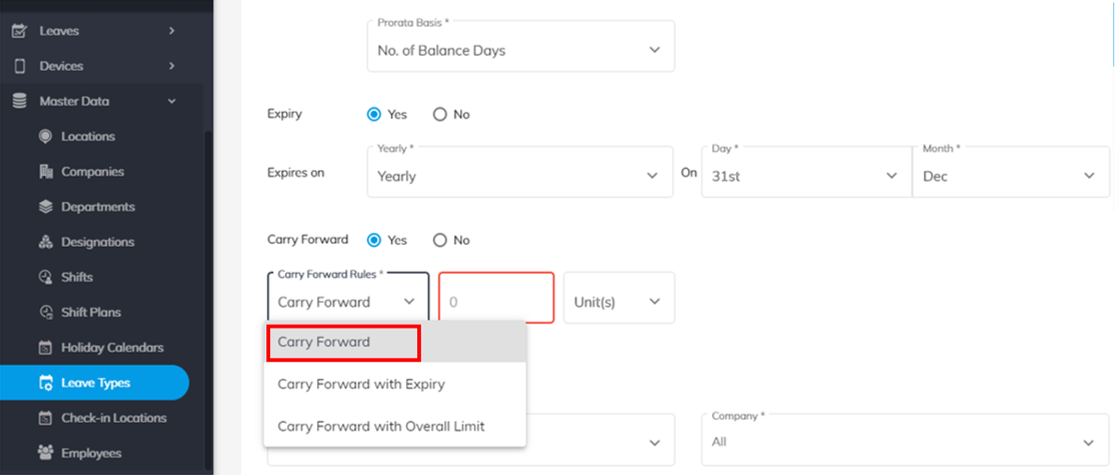
- Choose Yes if this leave is going to be carried forward and No if it does not.
- Select how you want it to be carried forward.
- Carry Forward the remaining units after the specified period is over.
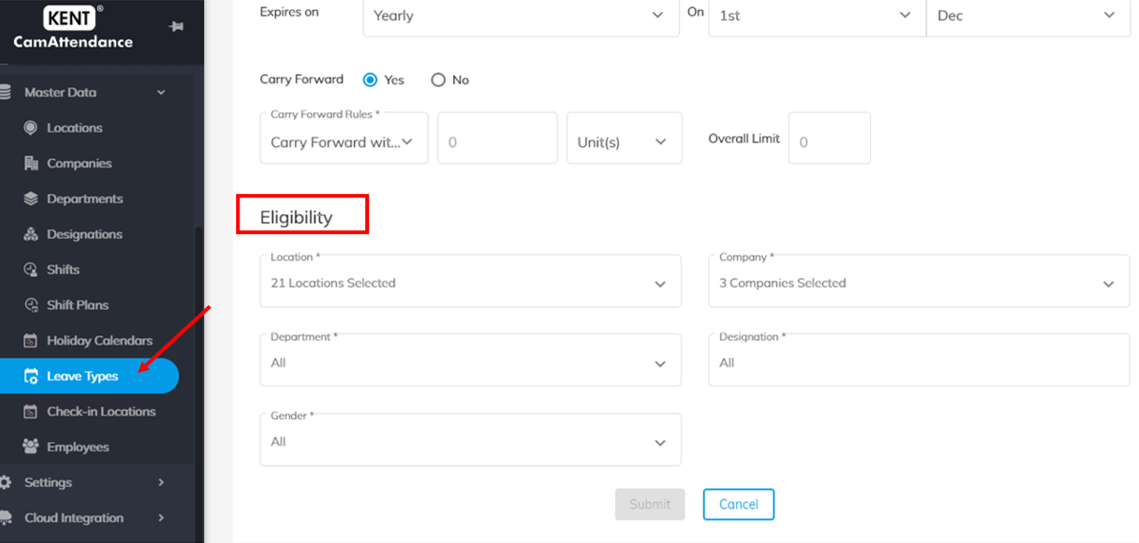
- Carry Forward with Expiry if you want the leaves carried forward should have an expiry. Select the day and month until these leaves are valid.

- Carry Forward with Overall Limit enables you to set a limit i.e. up to how many units or what percentage of leaves can be carried forward.

-
- Set a Limit. For example, enter 6 if up to 6 leaves can be carried forward on a yearly basis. Enter either units or percentage of leaves to be carried forward.
- Overall limit is the number of leaves that can be amassed. After this limit, leaves will be elapsed.
To set eligibility for a specific leave type, select one or multiple locations wherein the specified leave type will be applicable.
- Select one or multiple companies wherein the specified leave type is applicable.
- Select one or multiple departments wherein the specified leave type is applicable.
- Select one or multiple designations for which the specified leave type is applicable.
- Select one or multiple Genders for whom the leave type is applicable.
- Click Submit.
Editing a Leave Type
To Edit a Leave Type:
- Go to Home>Master Data>Leave Types. You can check the entire list of Leave Types added already.
- Click on the three dots
 under Actions on the right-hand side of your screen in front of the leave type you want to edit. Click Edit.
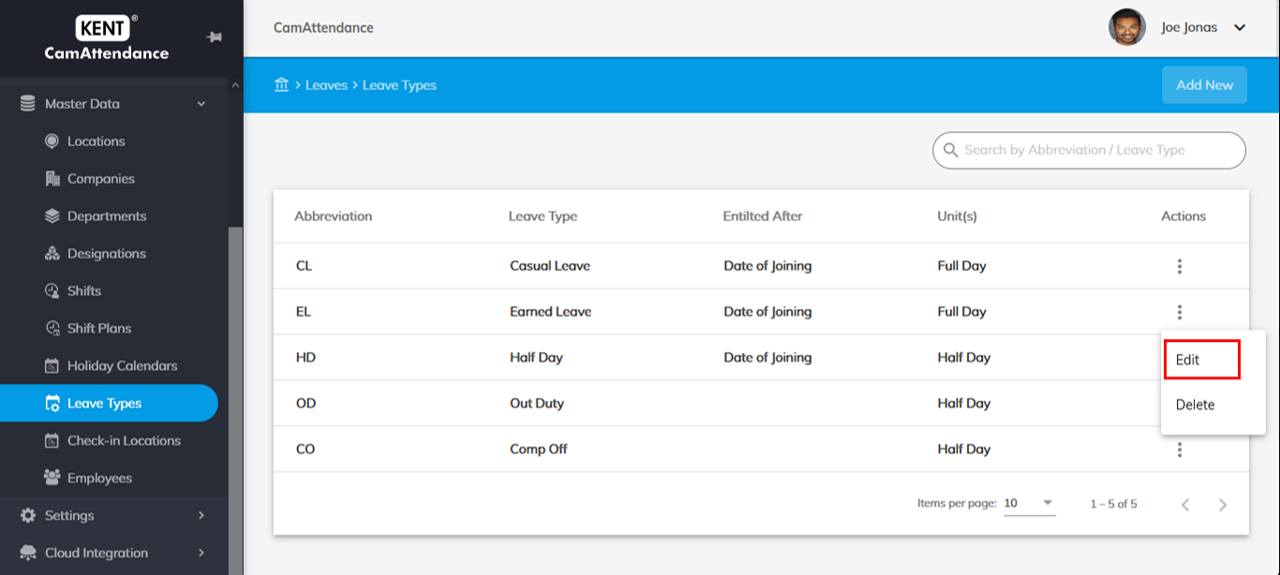
- Click Update when you are done with editing to update the leave type.

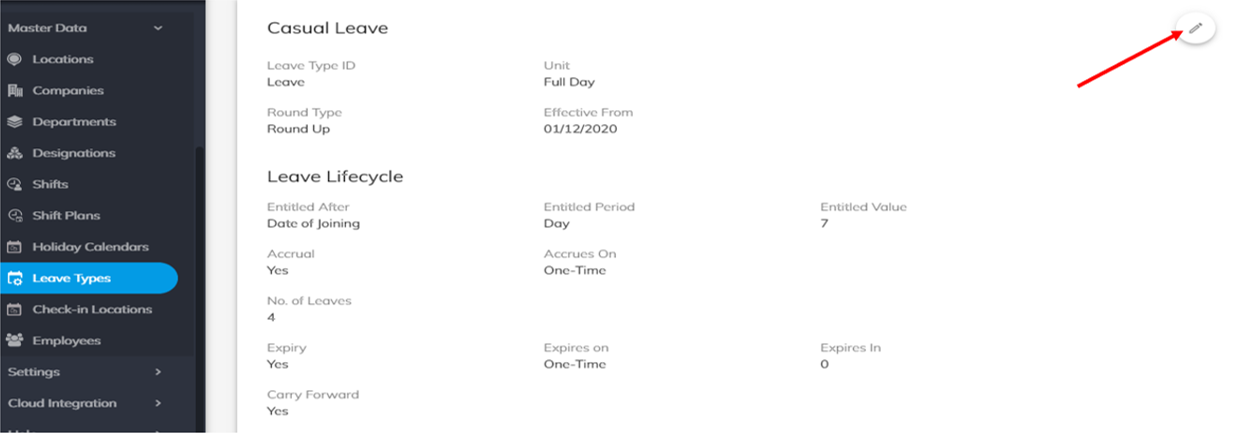
- You may even click on the leave type itself and then
 symbol in the upper right-hand corner to start editing a leave type. Click Update once you are done with editing.
Deleting a Leave Type
To delete a leave type, follow the below mentioned steps.
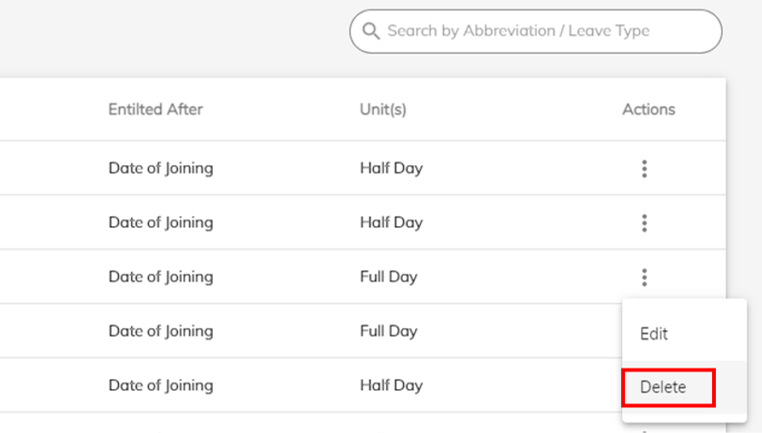
- Go to Home>Master Data>Leave Types. You can check the entire list of Leave Types added already.
- Click on Delete under Actions in the right-hand side of your screen in front of the leave type you want to delete.
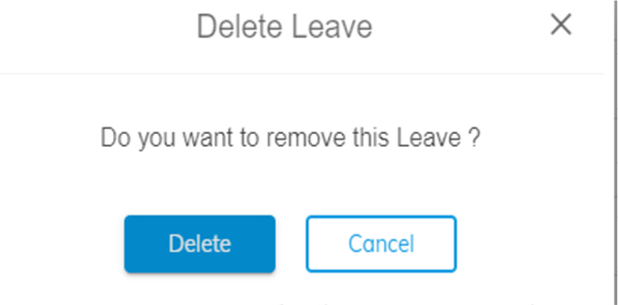
- A popup will appear asking you whether you really want to delete this leave type. Click Delete to delete or Cancel to go back.
Leave Transactions
To view Leave Transactions:
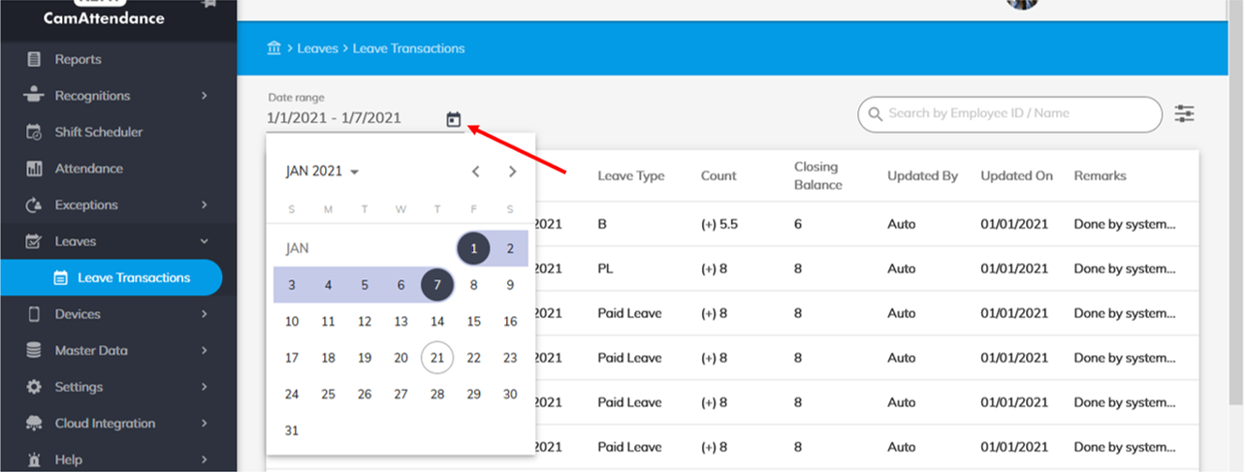
- Go to Home>Leaves>Leave Transactions. Set a Date Range i.e. Start Date and End Date by clicking the calendar icon. All leave transactions data within the specified Date Range can be seen on the screen.
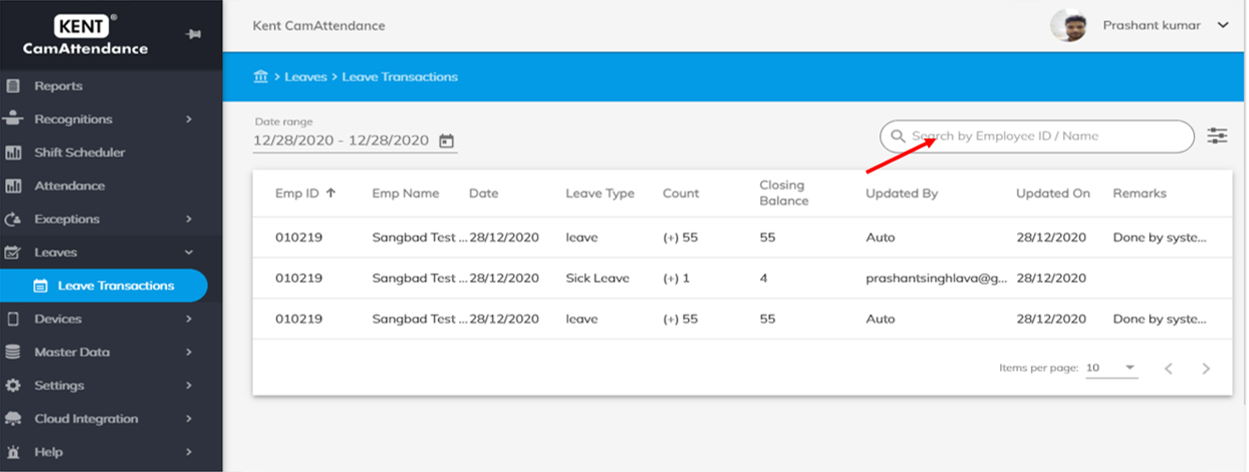
- Search by employee’s ID or name to view the transactions for a particular employee.
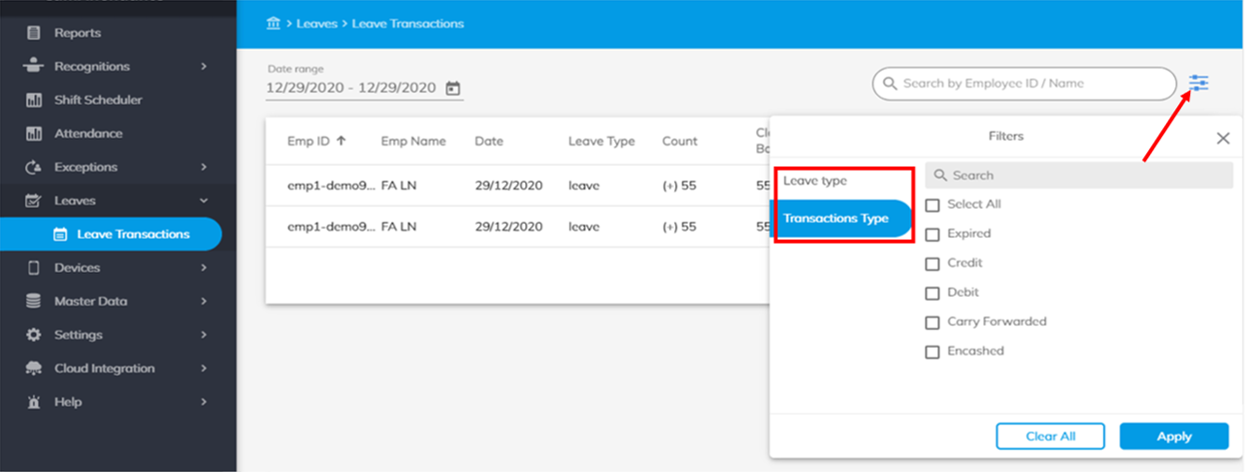
- To apply filters, click on
 symbol in the upper right-hand corner. Sort leave transactions by Leave type or Transactions type.
- Check the box to select how you want to sort the list of leave transactions.
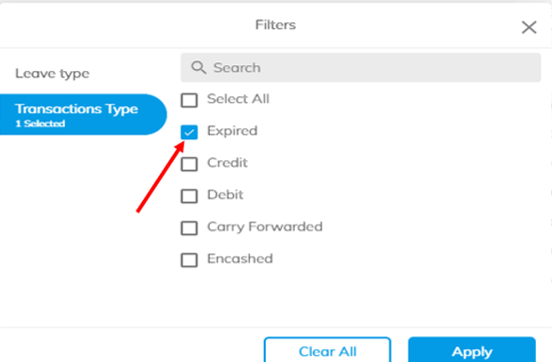
- Click Apply to apply or Clear All to remove all filters.
See also: