- Introduction
- Account
- Account Settings
- Attendance Settings
- Users
- Adding a New User
- Viewing a User’s Details
- Editing a User’s Details
- Deleting a User
- Disable/Enable a User
Introduction
Settings are primarily categorized into:
- Account Settings
- User Settings
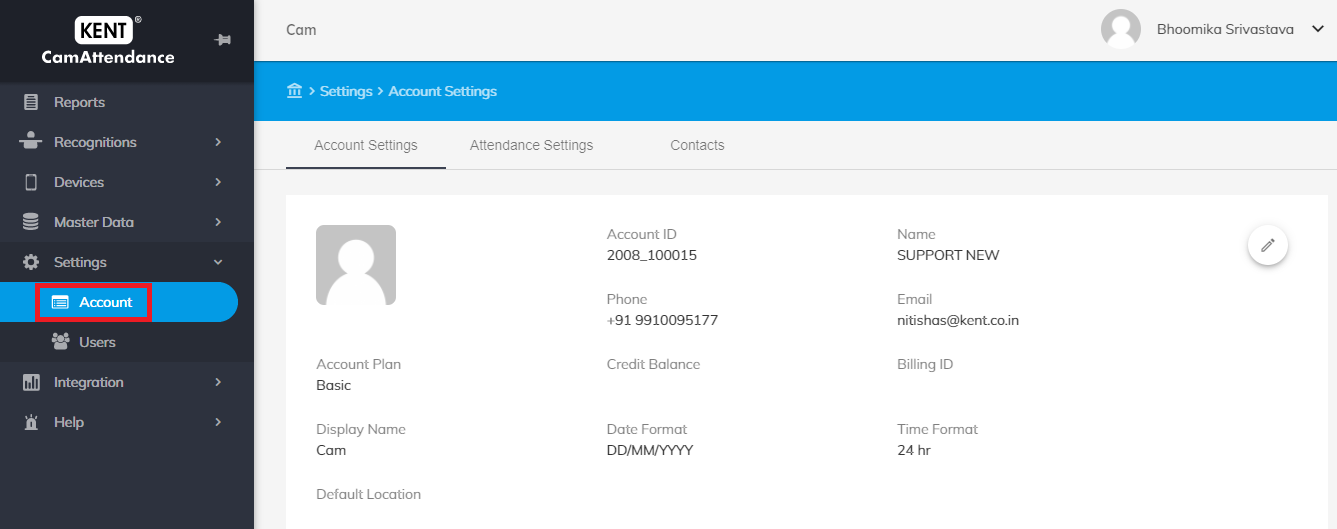
Account Settings: You can view the account plan which includes account ID, account name, phone number, email address, default license plan, credit balance, billing ID, applicable date and time format, display name and the default location. You can update the display name, date format, time format and the default location.
User Settings: You can view, edit, delete and disable the added user(s).

Account
You can view the account details and contacts associated with it.
Steps to reach account settings:
- Go to Home>Settings>Account
- Click on Account
Account Settings
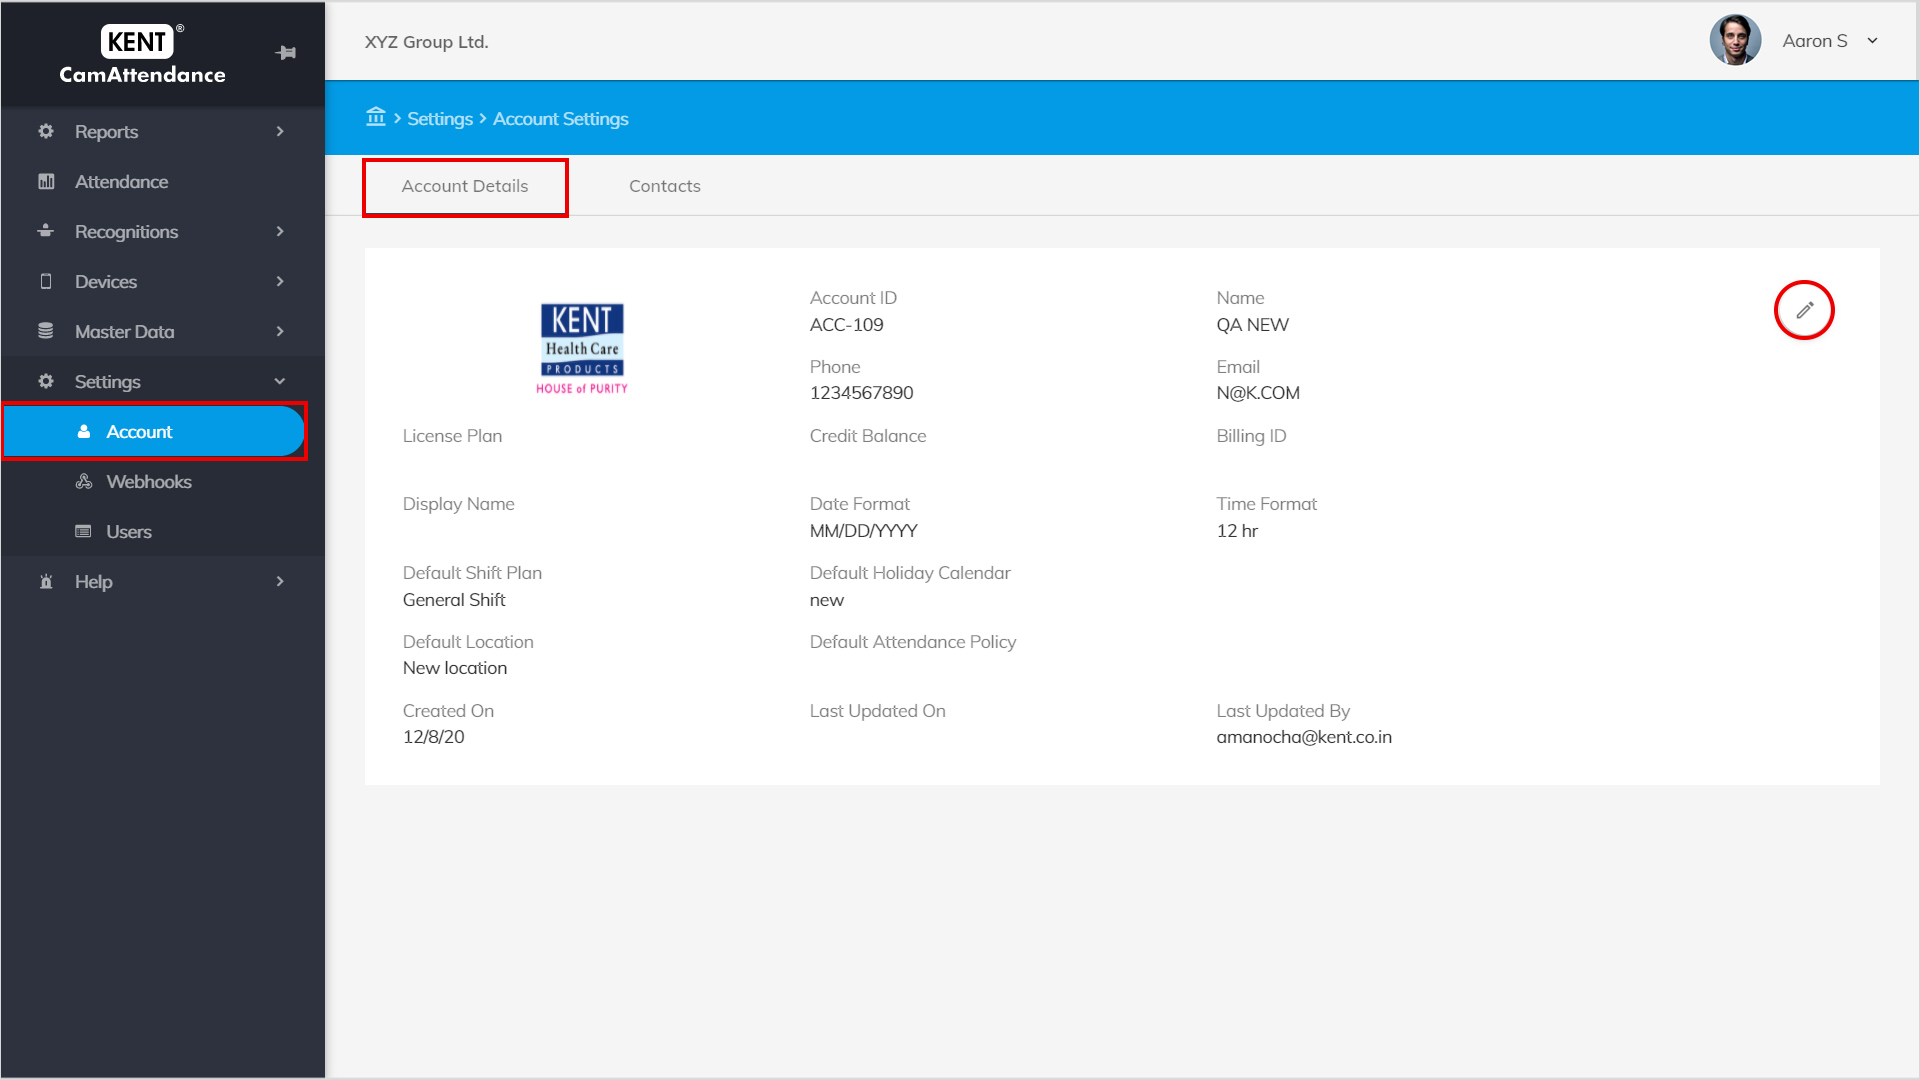
Account Details: When license plan is basic– You can view the account plan which includes the account ID, account name, phone number, email address, license plan, credit balance, billing ID, the applicable date and time format, display name, and the default location, date when account plan was created and last updated.
You can edit the below-mentioned fields:
a) Display Name
b) Date and Time Format
c) Default Location
You can make the necessary changes and click on Update.
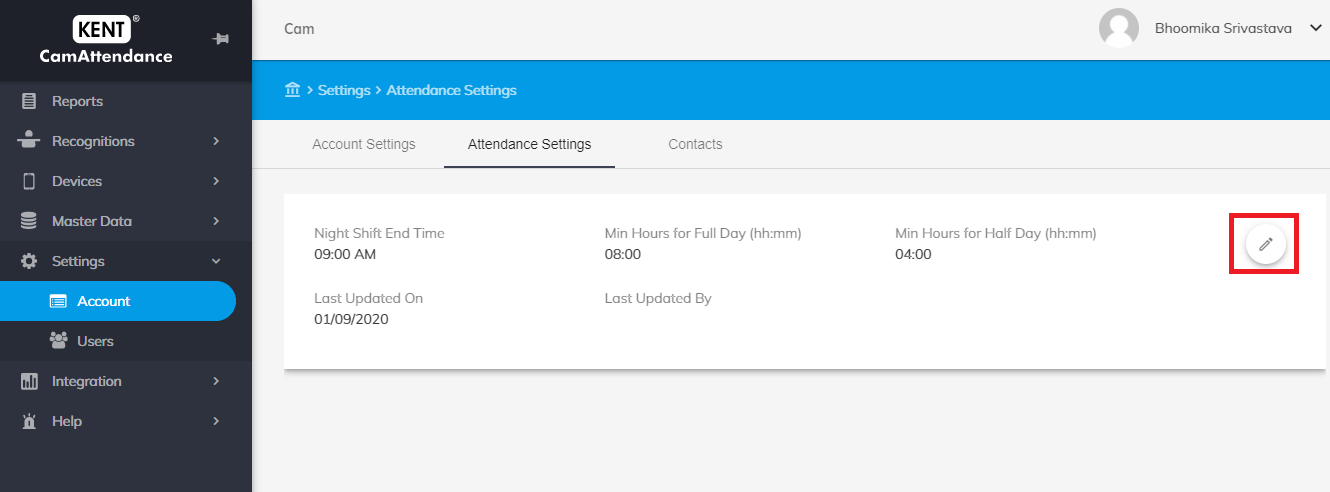
Attendance Settings
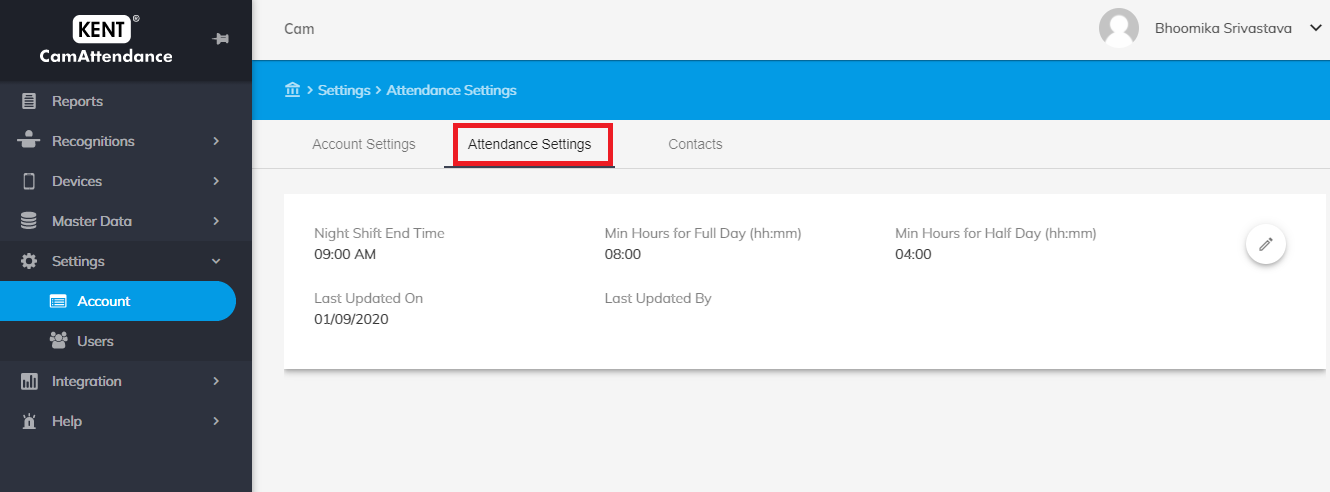
You can set the shift time according to your office timings.
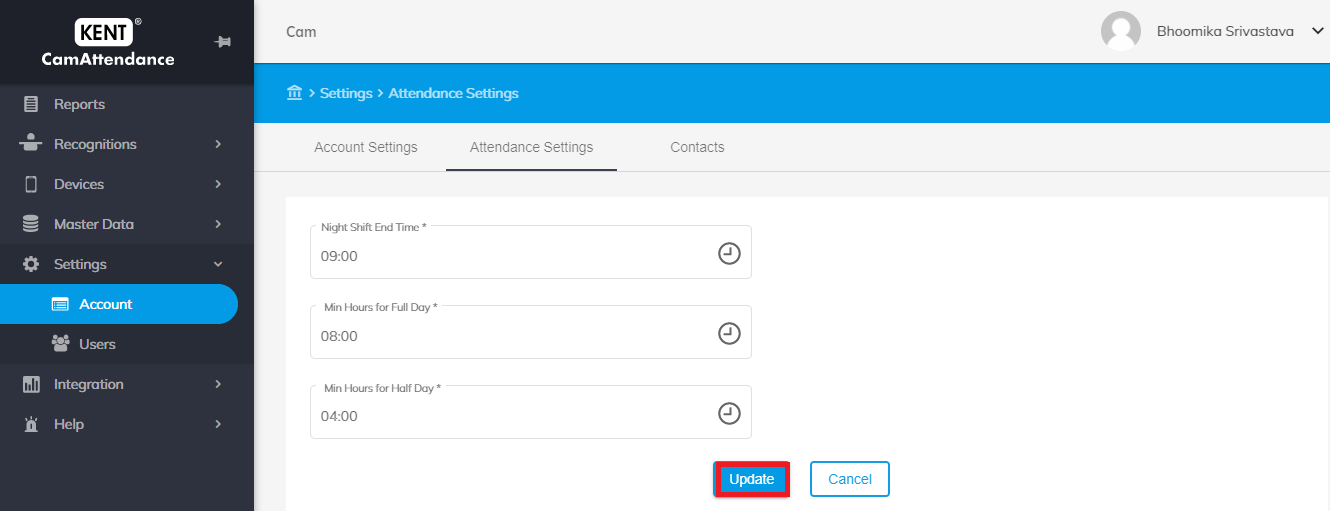
Night Shift End Time:
- You can set the shift time stating by what time the shift is going to end.
Minimum hours for full day:
- You can set the minimum hours of shift till what time the employee should be present into the office to make their full day attendance
Minimum hours for half day:
- Till what time employee should be present into the office to make their half day attendance
Edit:
- In the Attendance Settings window click on ‘edit’ icon located on top right corner.
- Make the required changes and click on Update.
Users
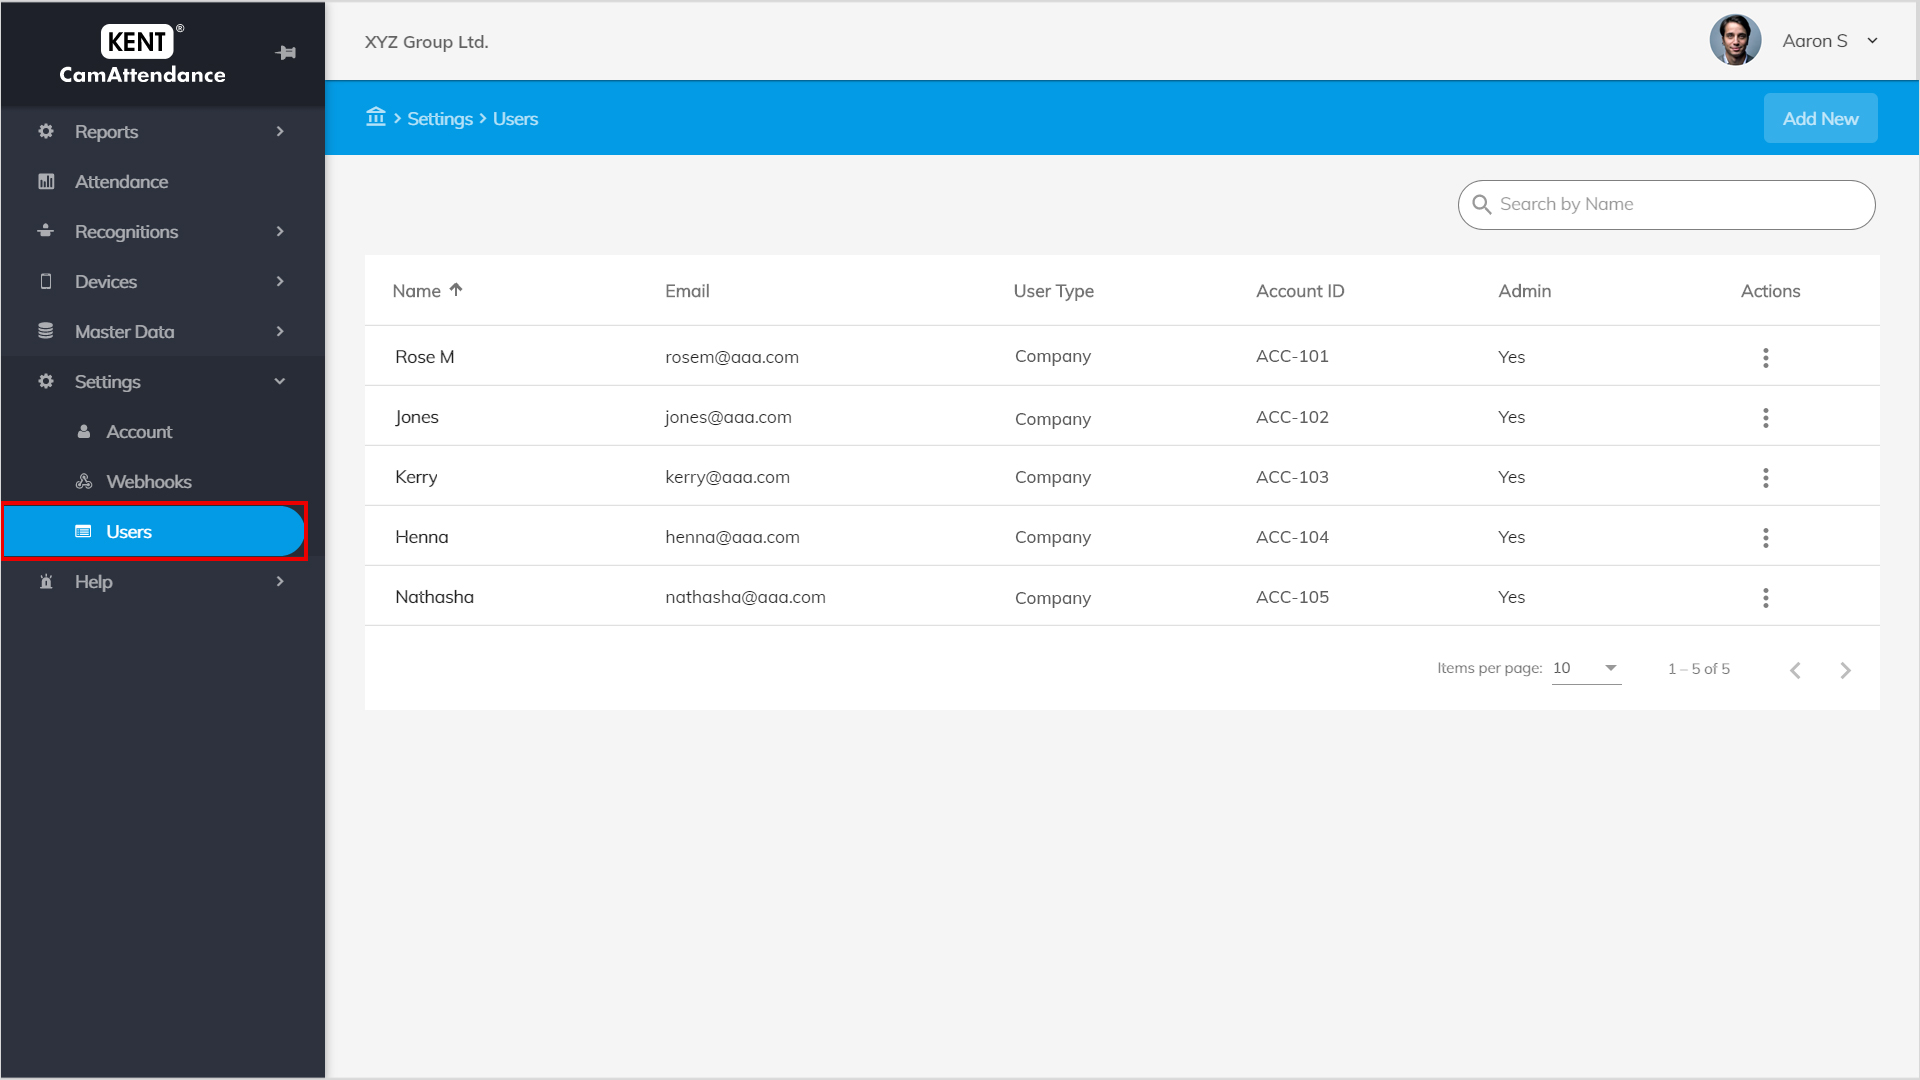
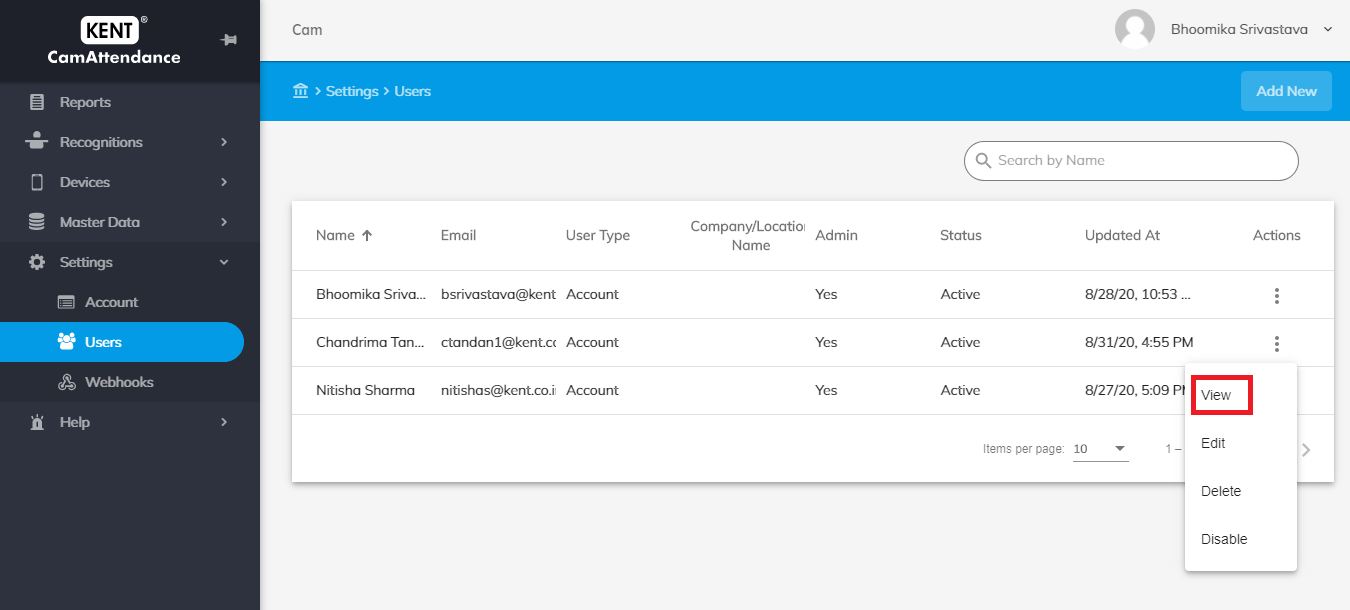
The list displays the user name, email, account ID, user type and whether the user is admin or not.
You can view, edit, delete, disable, and add new users in the master data.
Adding a New User
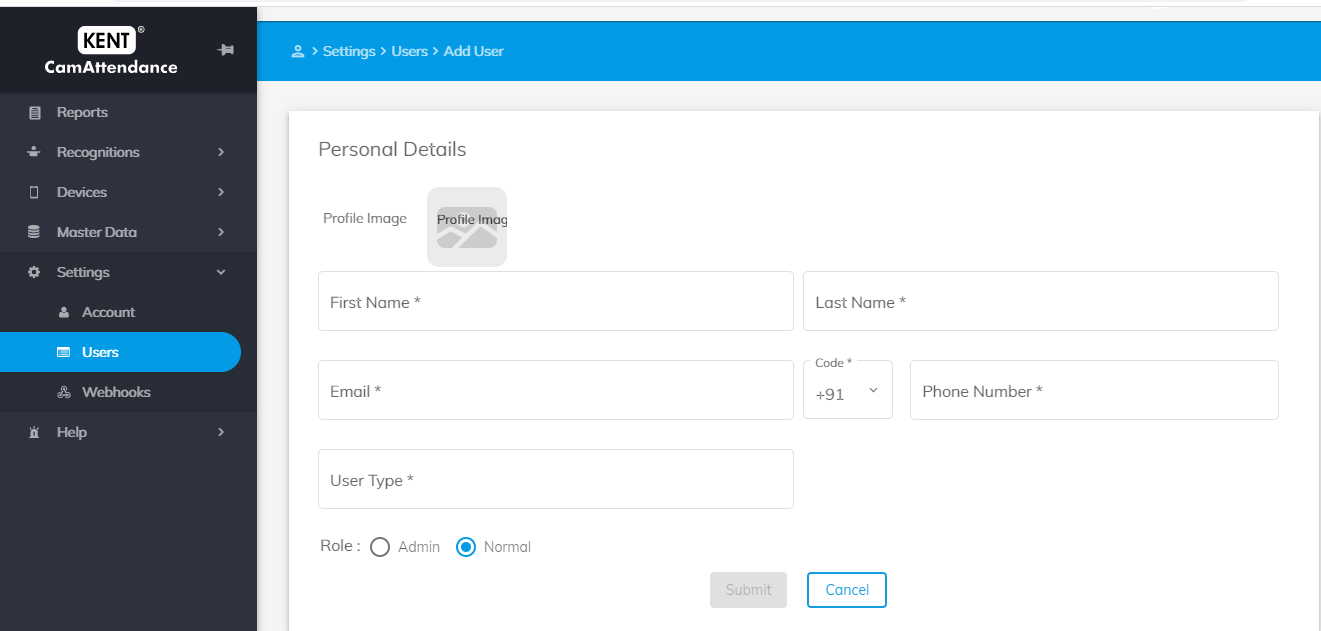
Follow the below procedure to add a new user in the database:
- Go to Home > Settings > Users
- Click on Add New
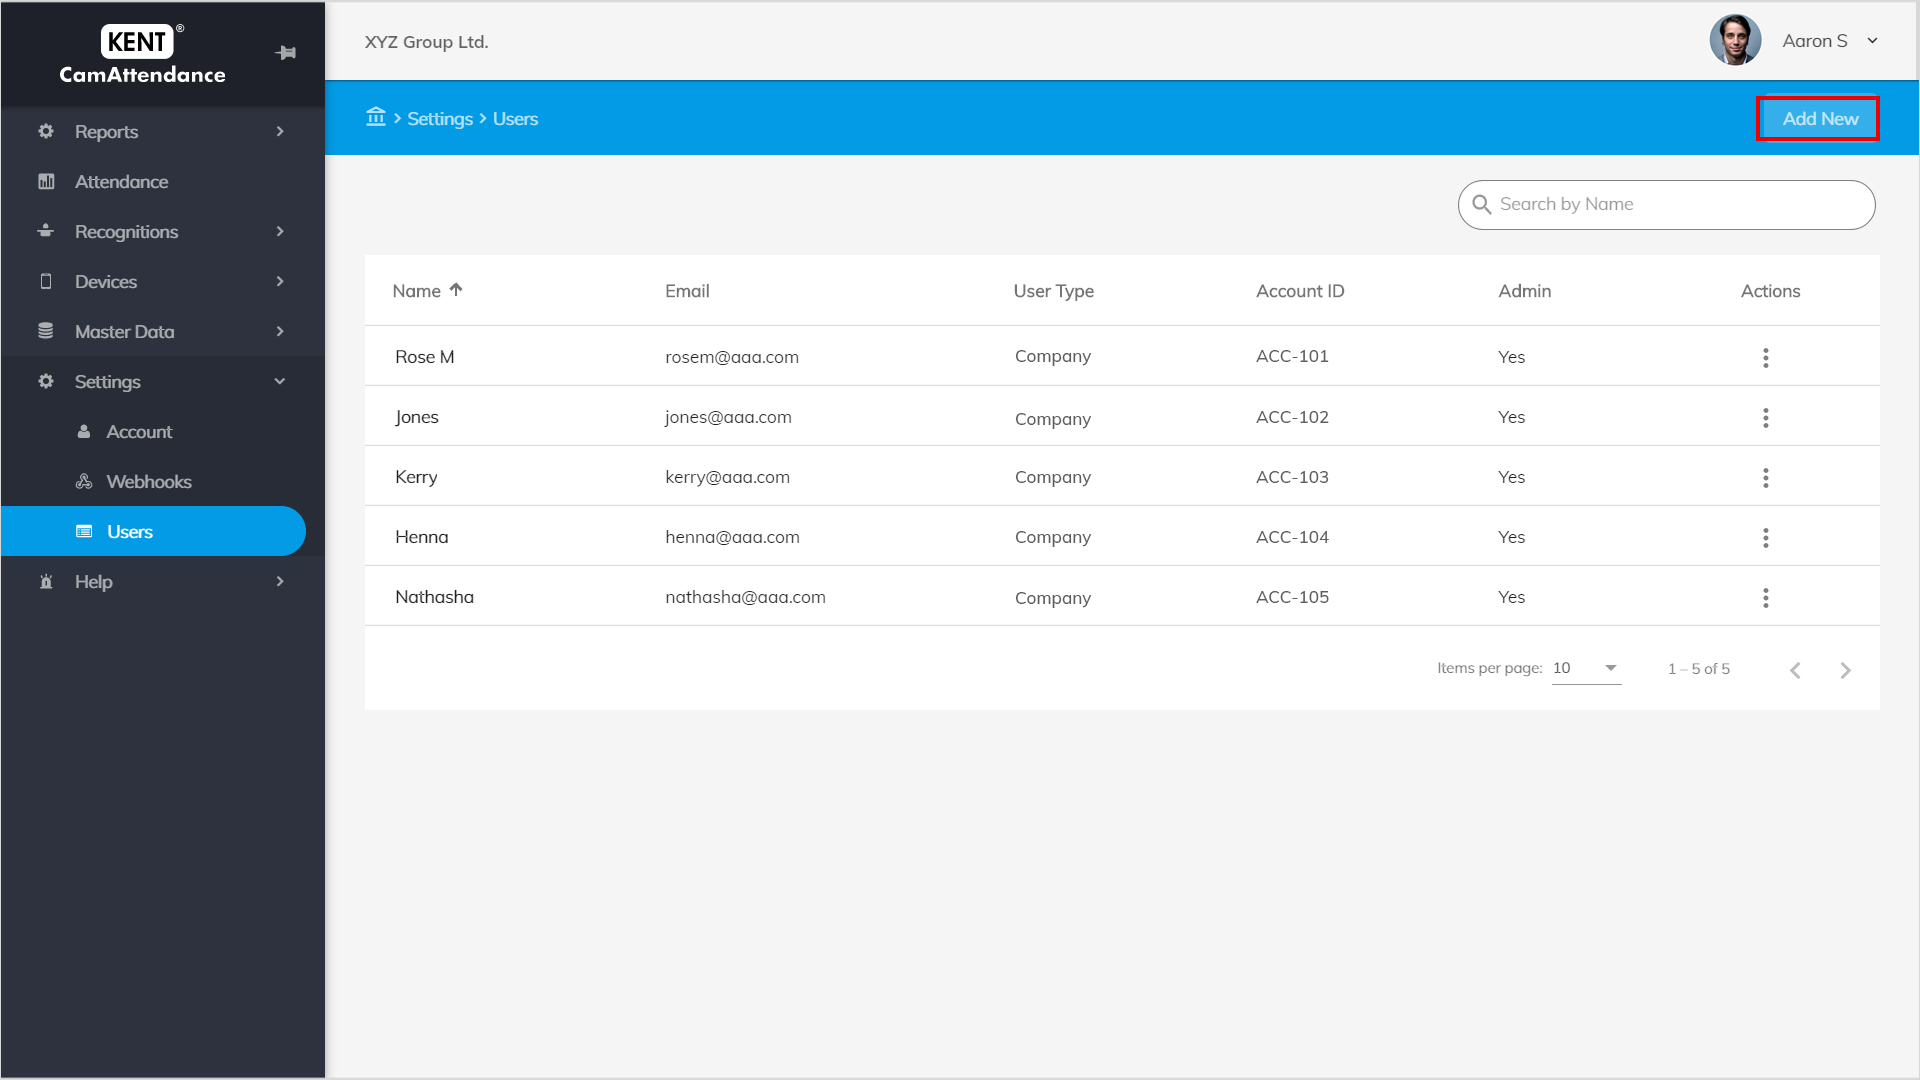
- Enter the following details:
-
- Upload profile picture
- First and Last Name*
- Email Address*
- Phone Number*
- Select user type from the drop-down
- Define role (admin or user)
-
- Click on Submit
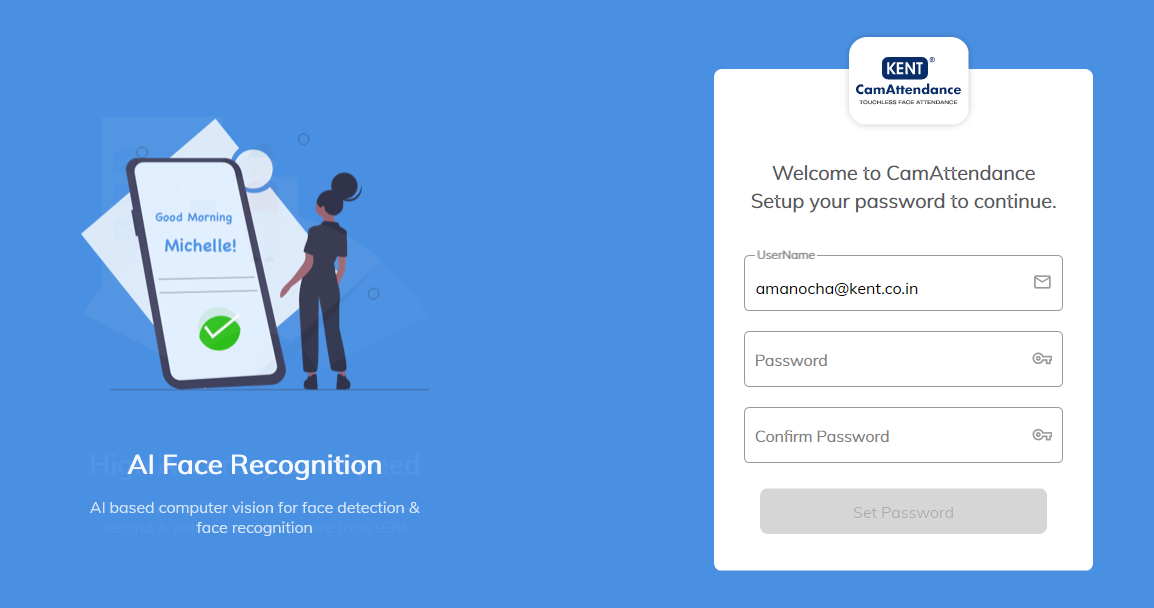
- Once you will submit the details of new user the user will get a mail with a link.
- You can click on that link and open the page of Kent Camattendance

- You have to set a new password according to yourself.
- You can login with your new Login Id & password.
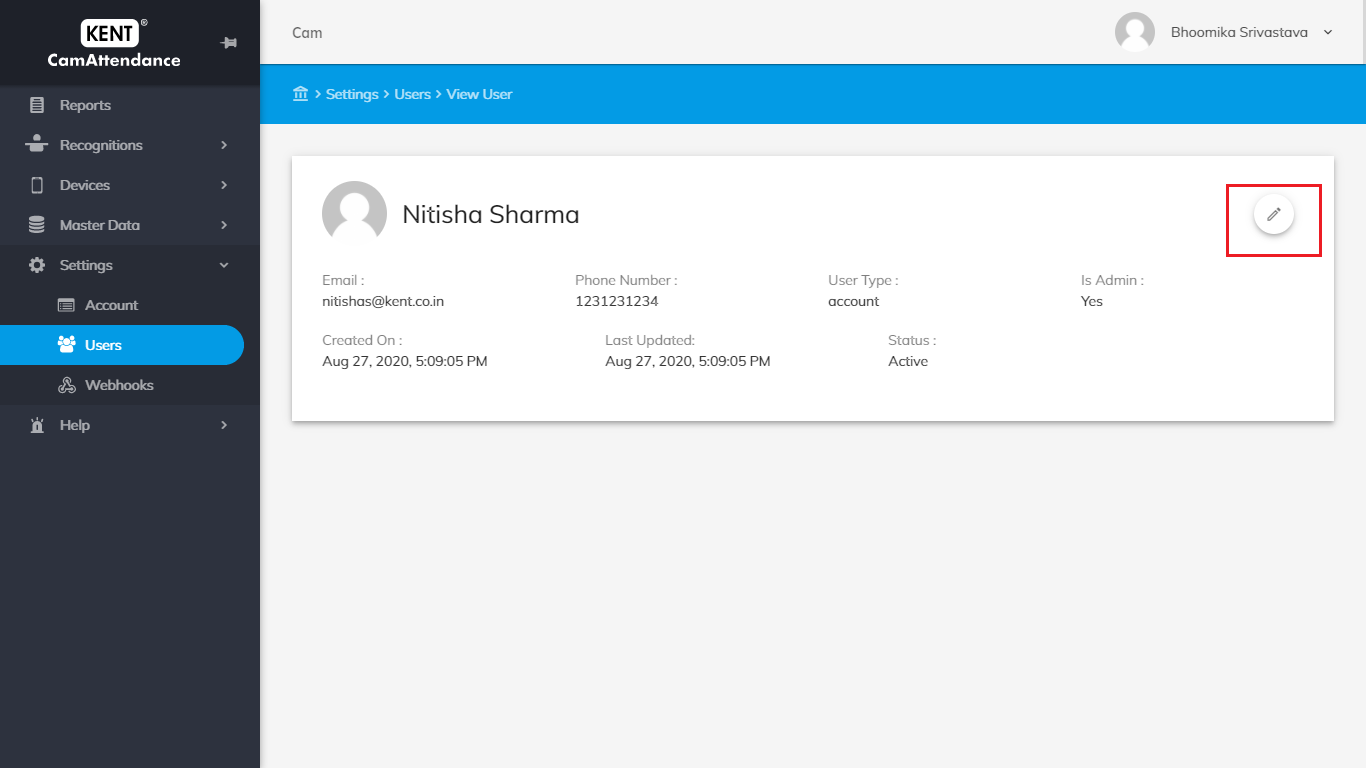
You can view user details in the master data.
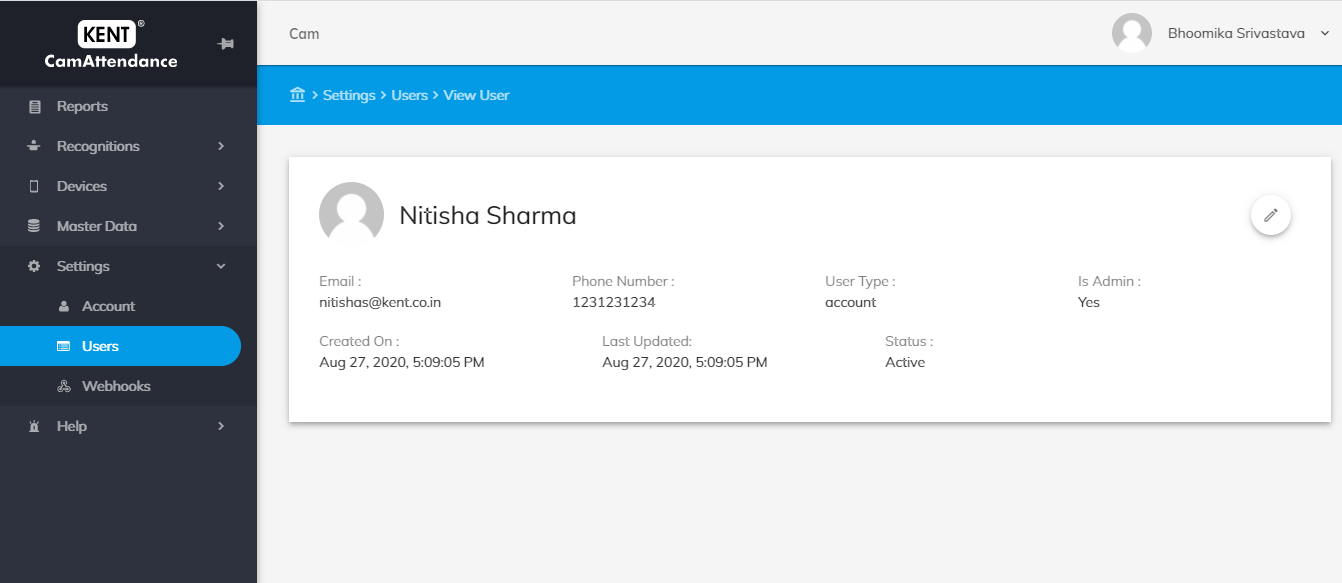
Viewing a User’s Details
The page displays the below mentioned details:
- User’s email id
- User’s phone number
- User type
- Admin or not.
- Created on Date
- Last Updated date
- Status i.e. Active/Inactive
Editing a User’s Details
There are two different ways to edit the user details:
1) In the View Users Window, click on the ‘edit’ icon located on the upper right corner. Make the required changes and click on Update.
2) In the Users page, tap on the three vertical dots appearing in the Action column and select Edit. Make the required changes and click on Update.
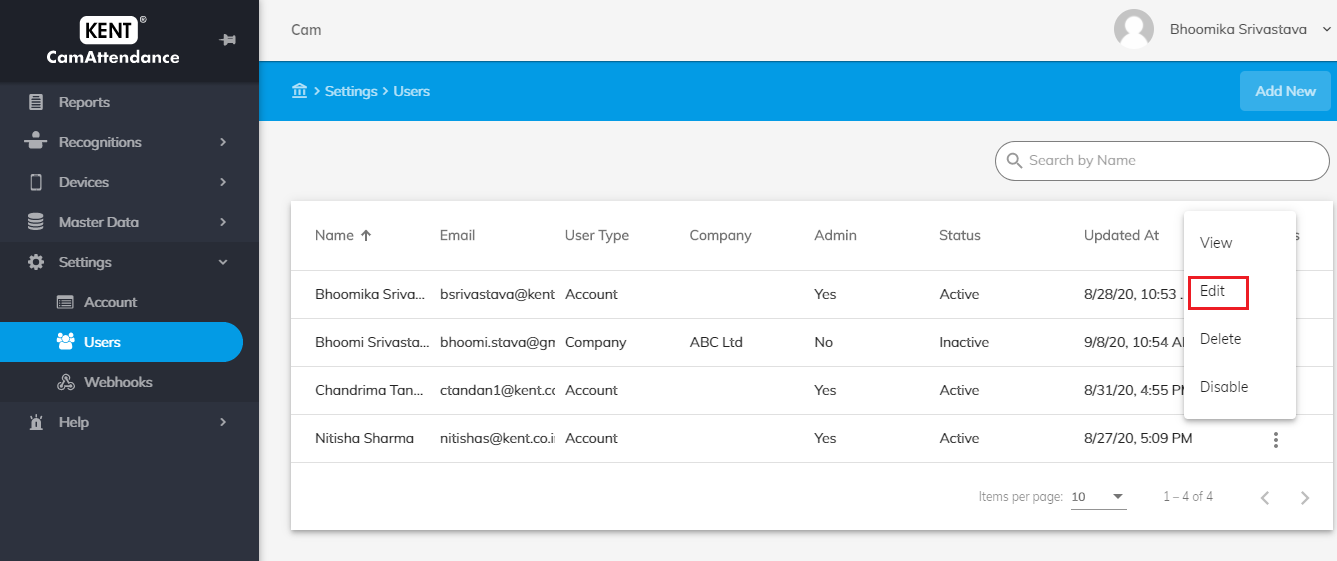
- Note: Only Name, mobile number & profile picture sections are editable.
Deleting a User
To remove the user from the list, tap on the three vertical dots appearing in the Action column, and select Delete.
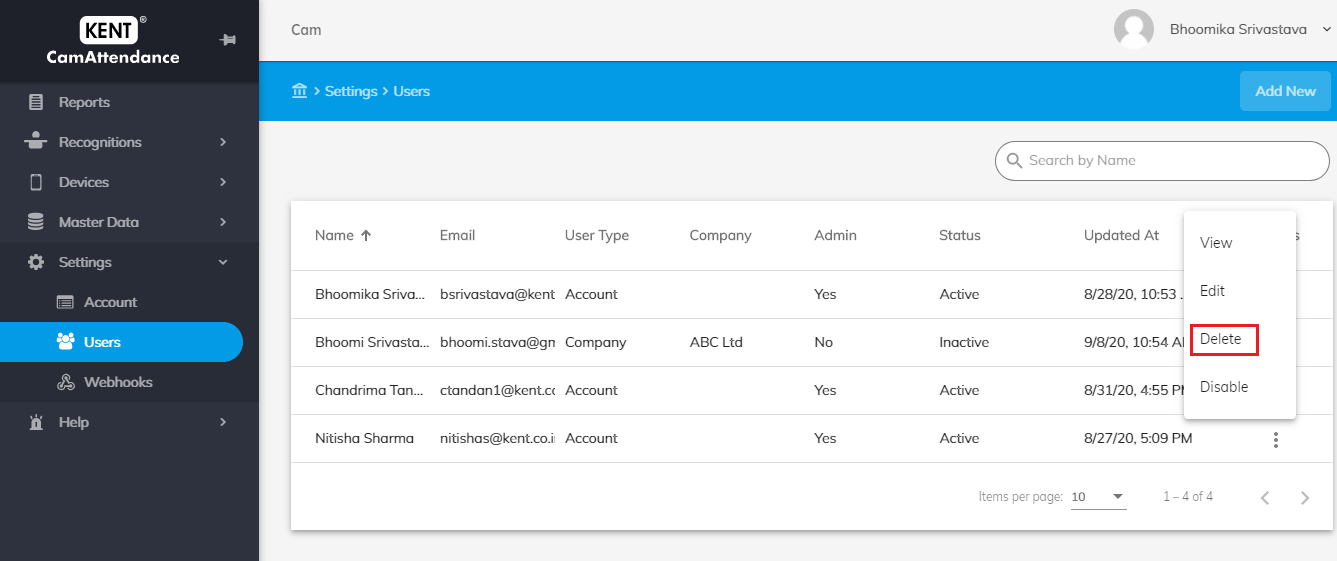
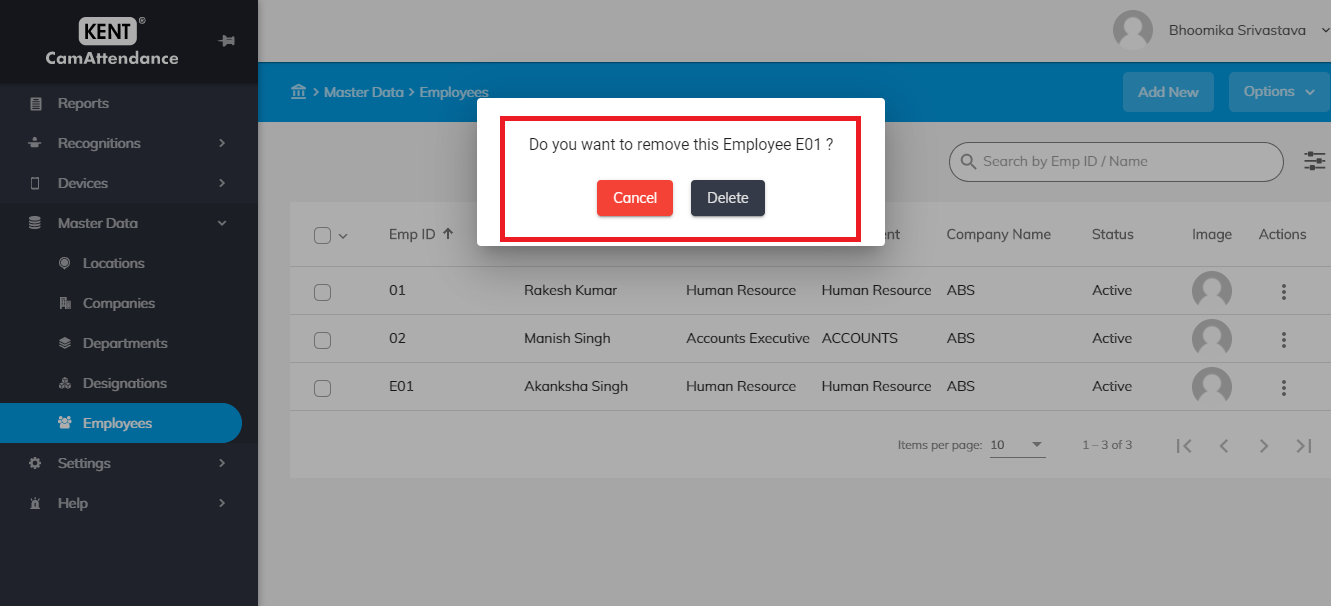
- In the confirmation dialog box, click on Delete
- If you do not want to delete select cancel to ignore deletion
Disable/Enable a User
Disable:
To inactive the user from the list, tap on the three vertical dots appearing in the Action column, and select Disable.
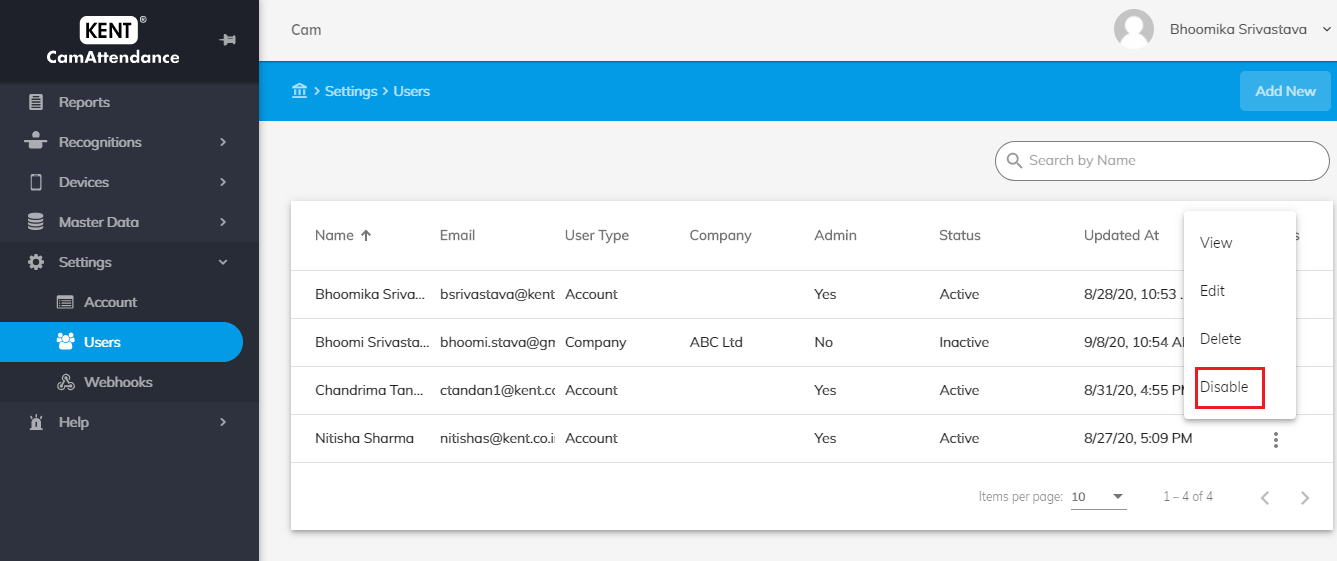
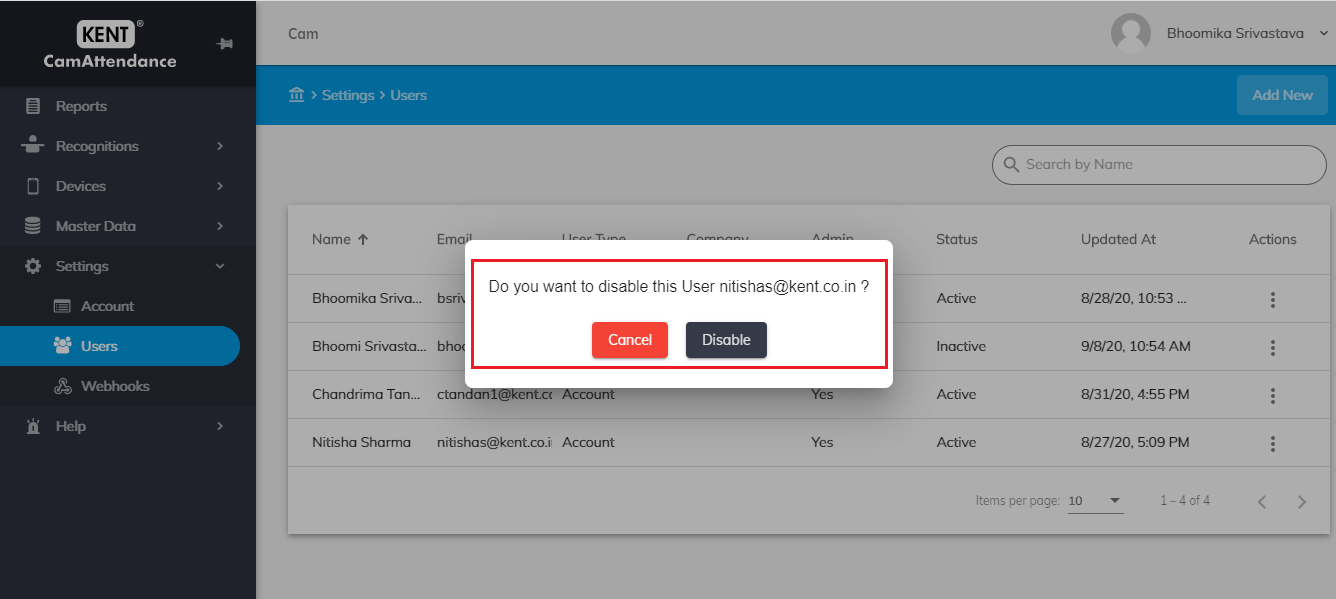
- Once you will disable the user its status will reflect as Inactive and user will get Inactive from system
- If you do not want to disable select cancel to ignore
Enable:
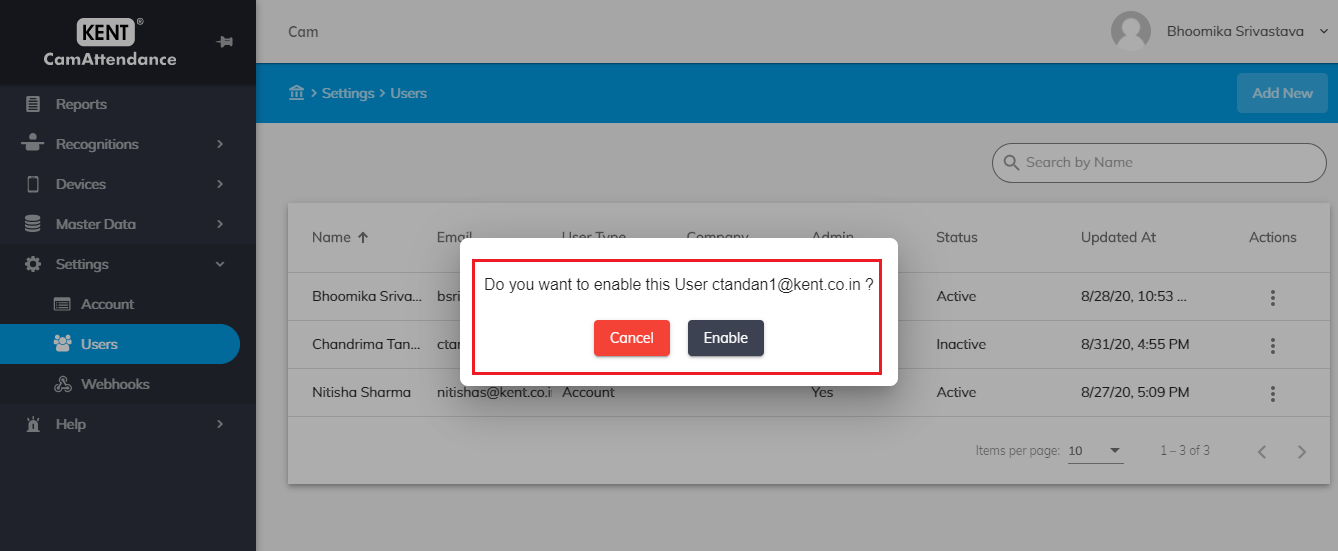
To active the user again you can tap on the three vertical dots appearing in the Action column, and select Enable.
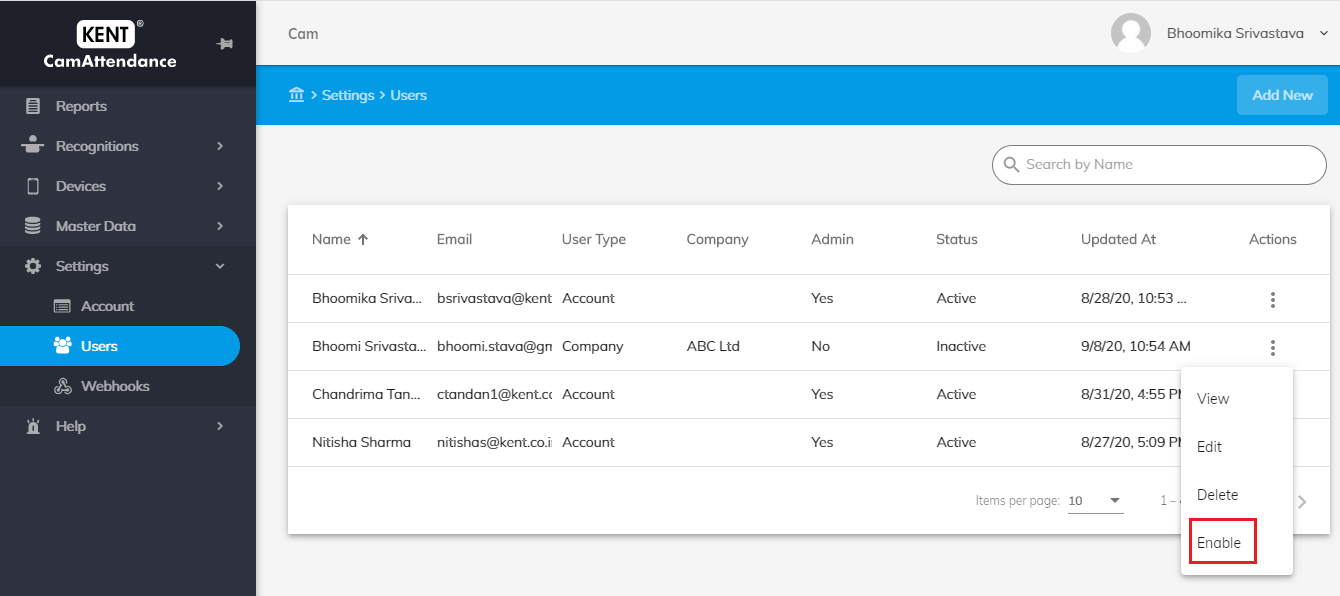
- Once you will enable the user he will again be active in your system
- If you do not want to disable select cancel to ignore
